Hva skal man finne på en søndag formiddag? Noe av det beste for meg er å gjøre noe som involverer et kamera, enten det nå er ute eller inne. Denne gangen ble det inne. Fint lys gjennom vinduet, kjøkkenbordet ryddet og to brød står til heving. I fotoklubben har vi drevet litt med stilleben og produktfoto, så jeg har litt inspirasjon derfra. Jeg har også diverse grønnsaker i kjøleskapet, noen epler på et fat og en rosebukett i en vase. Dermet burde det være duket for et par timer med moro.
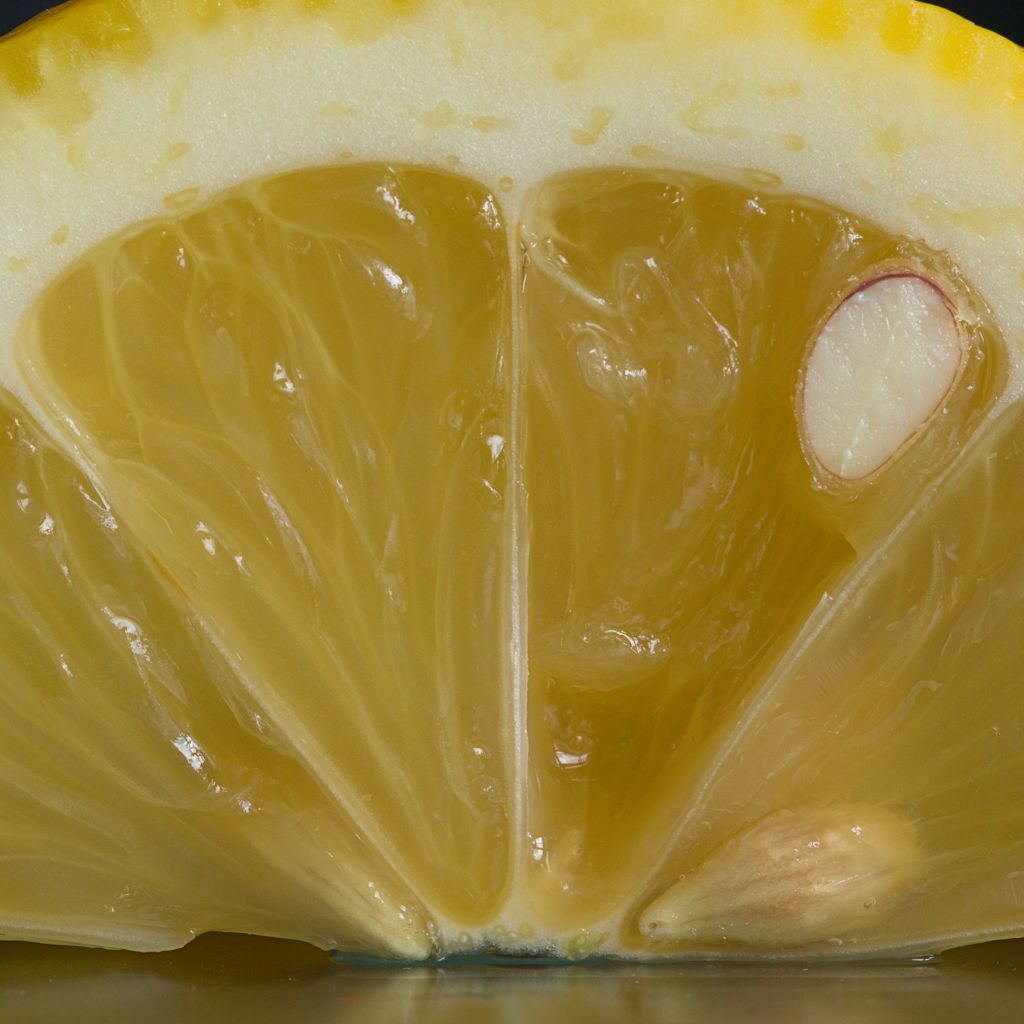
Først ut var en halv sitron som hadde sett sine beste dager. Den ble delt i to for å få et ferskt snitt og lagt på en glassplate på et svart tøystykke. Tanken var å ta nærbilder av snittflaten som fyller bildet. Hvor vellykket det var vet jeg ikke, men en fin oppvarmingsøvelse. Det mest vellykkede var nok da jeg fikk lyset fra vinduet til å skinne litt gjennom skallet.
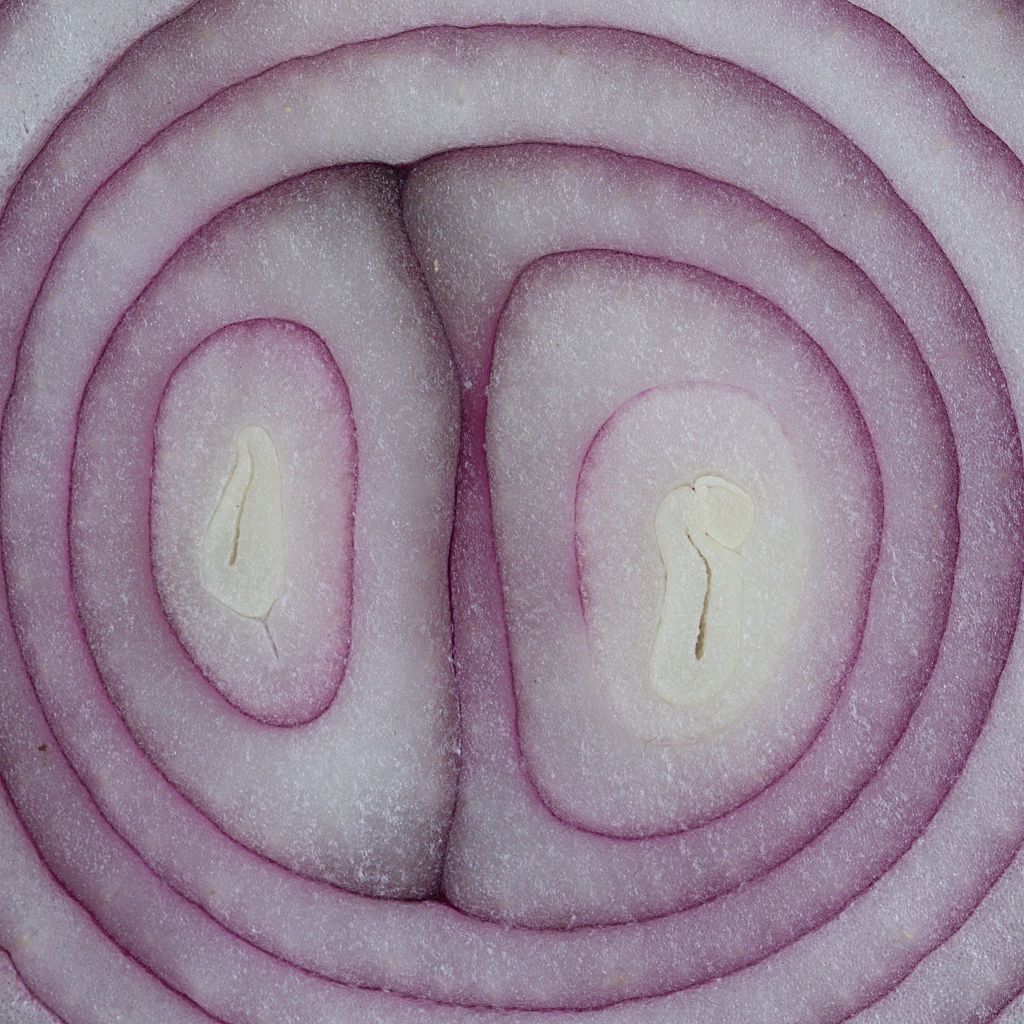
En rødløk har et tydelig og fint ringmønster som egner seg godt til et nærbilde. Dette var nok mer vellykket enn sitronen.
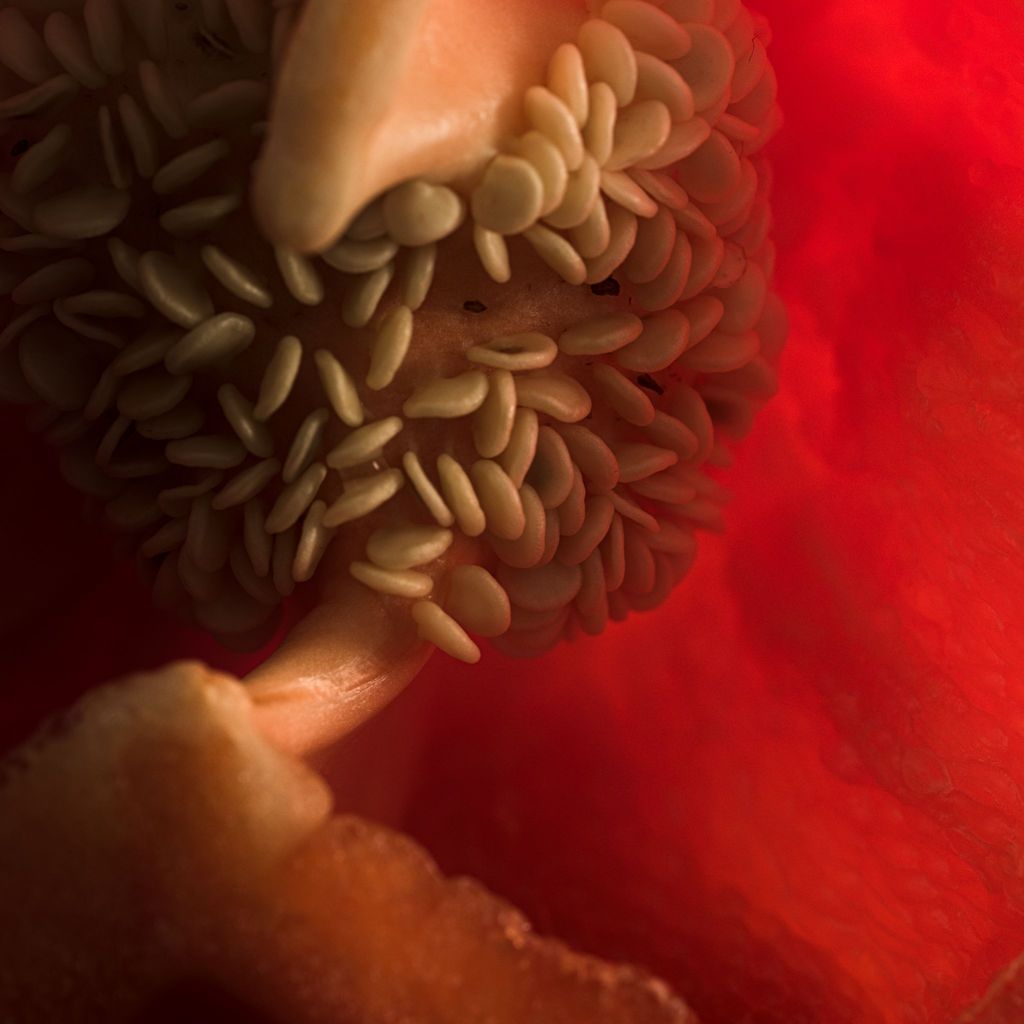
Motlys som skinner gjennom passer enda bedre på resten av en paprika. Her fikk jeg fram strukturen på innsiden av paprikaen så det røde fruktkjøttet nesten ser ut som glødende lava.
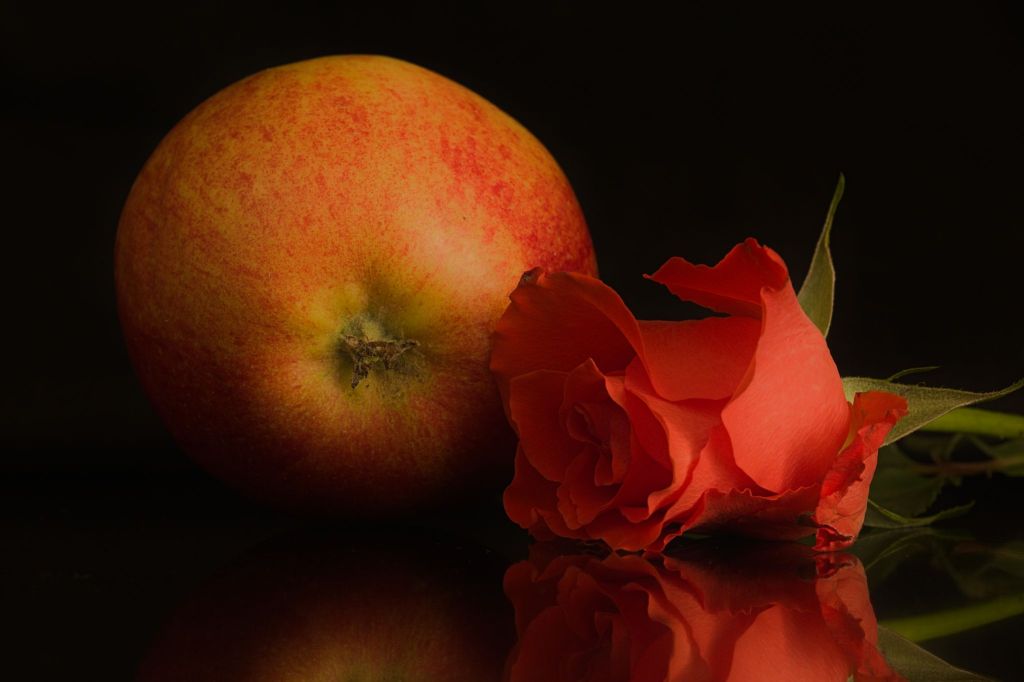
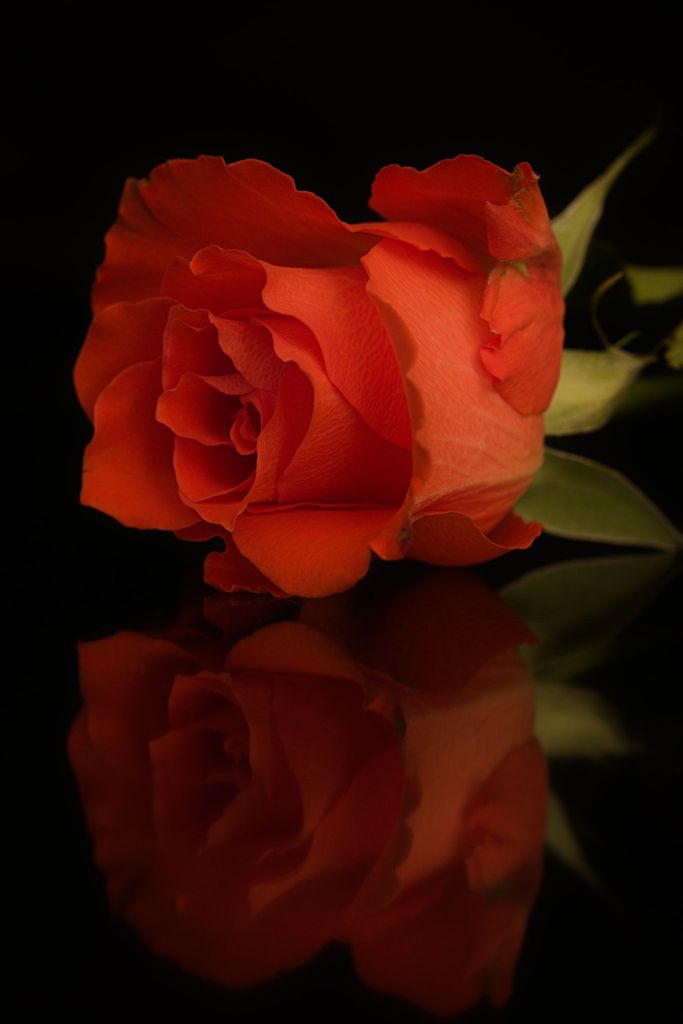
Neste forsøk er med et eple. Jeg ville helst ha skikkelig sidelys med dyp skygge på den ene siden. Dessverre var rommet for lyst til det, så et eple alene funket dårlig. Da kom jeg på å legge en rose sammen med eplet. Med svart tøy som underlag og bakgrunn ble det bedre, men så ble jeg distrahert av alarm på mobilen.
Brødene var ferdig stekt. Der er det jo også et motiv. Nybakt brød i ovnen og lagt til avkjøling på rist. Eksperimentering med ulik dybdeskarphet og litt tilbehør som smør og ost.
Siden jeg hadde beveget meg over til komfyren slo det meg at den keramiske toppen er jo en svart, blank glassplate. Den kan kanskje fungere til å reflektere ting som legges på. Som tenkt, så gjort. Den hvite kanten rundt komfyren, samt veggen, skjules med svart tøy. Eple og rose legges på komfyren. Lavest mulig kameravinkel og Action!
Dette ble bra. Litt forskjellige varianter prøves ut før jeg går over til bare roser. Jeg har tre forskjellige farger som jeg prøver ut enkeltvis og alle tre sammen. Det var ganske dunkelt lys ved komfyren, men det er jo ingen bevegelse i motivene og kamera står på stativ, så lukkertiden kan bli hvor lang som helst. Jeg syntes også lyset fra vinduet ga litt mye kontrast, så jeg dempet det med å holde en papplate foran. Dermed ble belysningen jevnere.
Oppsettet ved komfyren
Kamera: Canon EOS 80D Objektiv: Tamron 90 mm macro
Søndag 20. oktober åpnet jeg min første egne fotoutstilling. 17 natur- og landskapsbilder vises på Rykkinn Seniorsenter i Bærum. På åpningsdagen ble det solgt tre bilder, noe jeg er godt fornøyd med. Siden dette også var dagen for NRKs årlige tv-aksjon, bestemte jeg meg for at halvparten av overskuddet på eventuelt salg av bilder skulle gis til aksjonen, som denne gangen gikk til Barnekreftforeningen. Salget resulterte i 1200 kroner til TV-aksjonen.
Fra opphengingen
Jeg hadde også laget en fotobok med alle bildene fra utstillingen, sammen med litt tekst. Denne var det også mulig å kjøpe, og tre heldige besøkende lot seg friste. Boka kan du se elektronisk her.
Det gir virkelig en egen følelse å se bildene sine printet på et godt papir, innrammet og hengt på en vegg. Og etter utstillingen skal de solgte bildene komme opp på nye vegger og glede nye mennesker. Det er ganske fantastisk å tenke på.
En fornøyd utstiller. Foto: Bjørn Bergersen
En stor takk går til damene på Oscar Studio og galleri på Lillestrøm. Der fikk jeg god hjelp til forberedelsene. Først av Karine, som hjalp meg med å plukke ut bilder, og senere Kristin som printet dem. Jeg kommer helt sikkert til å bruke deres tjenester igjen.
Det er på høy tid å blåse liv i denne bloggen igjen. Det er nå over fire år siden siste innlegg og mye har skjedd, så vi får ta en liten oppsummering av fotolivet de siste årene.
I am lucky enough to live close to nature. A choir of birds wake me up way too early every morning at this time of the year, and if I go out for a walk, I can be surrounded by trees in no time.
So yesterday evening I grabbed my camera and my long lens and went for a little walk to see if I could get some bird photos. The sun was low and would go down in an hour or so, so I hoped for some good light on the tree tops. I walked quietly through the woods, as not to scare the birds.
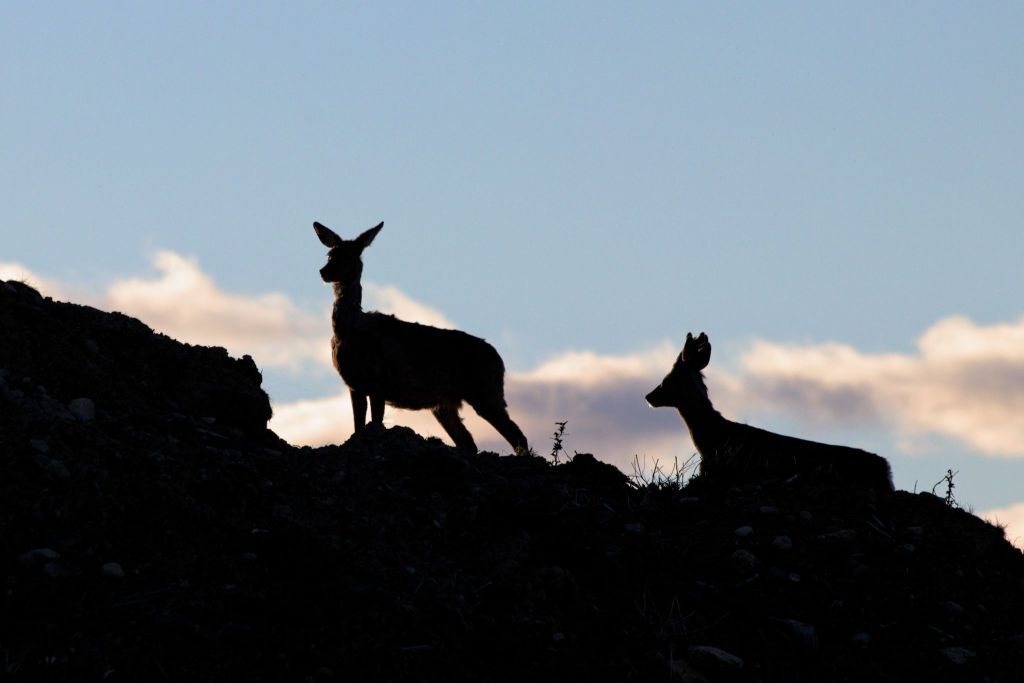
I didn’t think much of larger wildlife, but after a while I heard a sound some distance to the right and behind me. I turned around and saw two deer climbing a steep slope. I raised my camera to the eye and fired off a few shots, but as it was against the light I didn’t have much hope. Luckily, I had my camera set to Manual mode and I had already set a decent exposure. Therefore I knew it wouldn’t be too far off, even though I had set it for when I would have the light from behind. That’s the beauty of Manual.
As the deer climbed to the top of the slope, I saw them silhouetted against the sky, and I got this as my final shot of them:
Two deer. Canon 80D with Canon EF 70-300 f/3.5-5.6 IS USM @300 mm. 1/1000 s, f/8, ISO 800
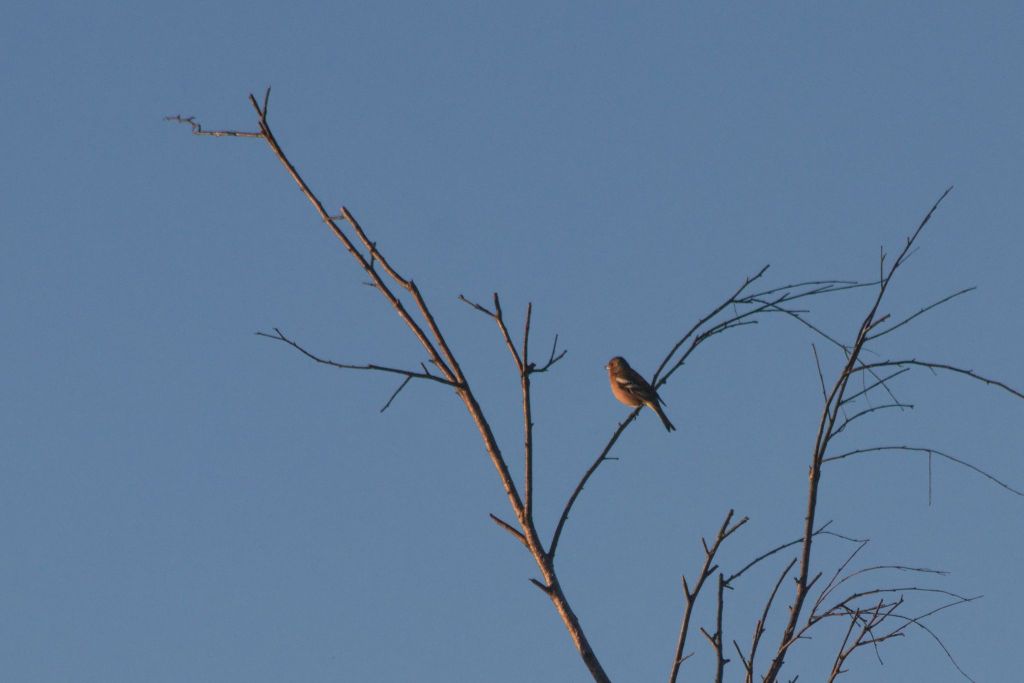
After the deer disappeared, I sat down on a rock, waiting for some birds to come by. Most of the birds around here except for magpies and crows are quite small, and my lens is only 300 mm in the long end on a crop sensor camera, so I didn’t expect to get any real close ups, as the birds are quite shy. This chaffinch is a good example of what I could expect:
Chaffinch. Canon 80D with Canon EF 70-300 f/3.5-5.6 IS USM @300 mm. 1/1000 s, f/8, ISO 800
This is also a quite heavy crop, and my lens is not the sharpest when fully zoomed in. It is still fun to go hunting, and some times unexpected things happen.
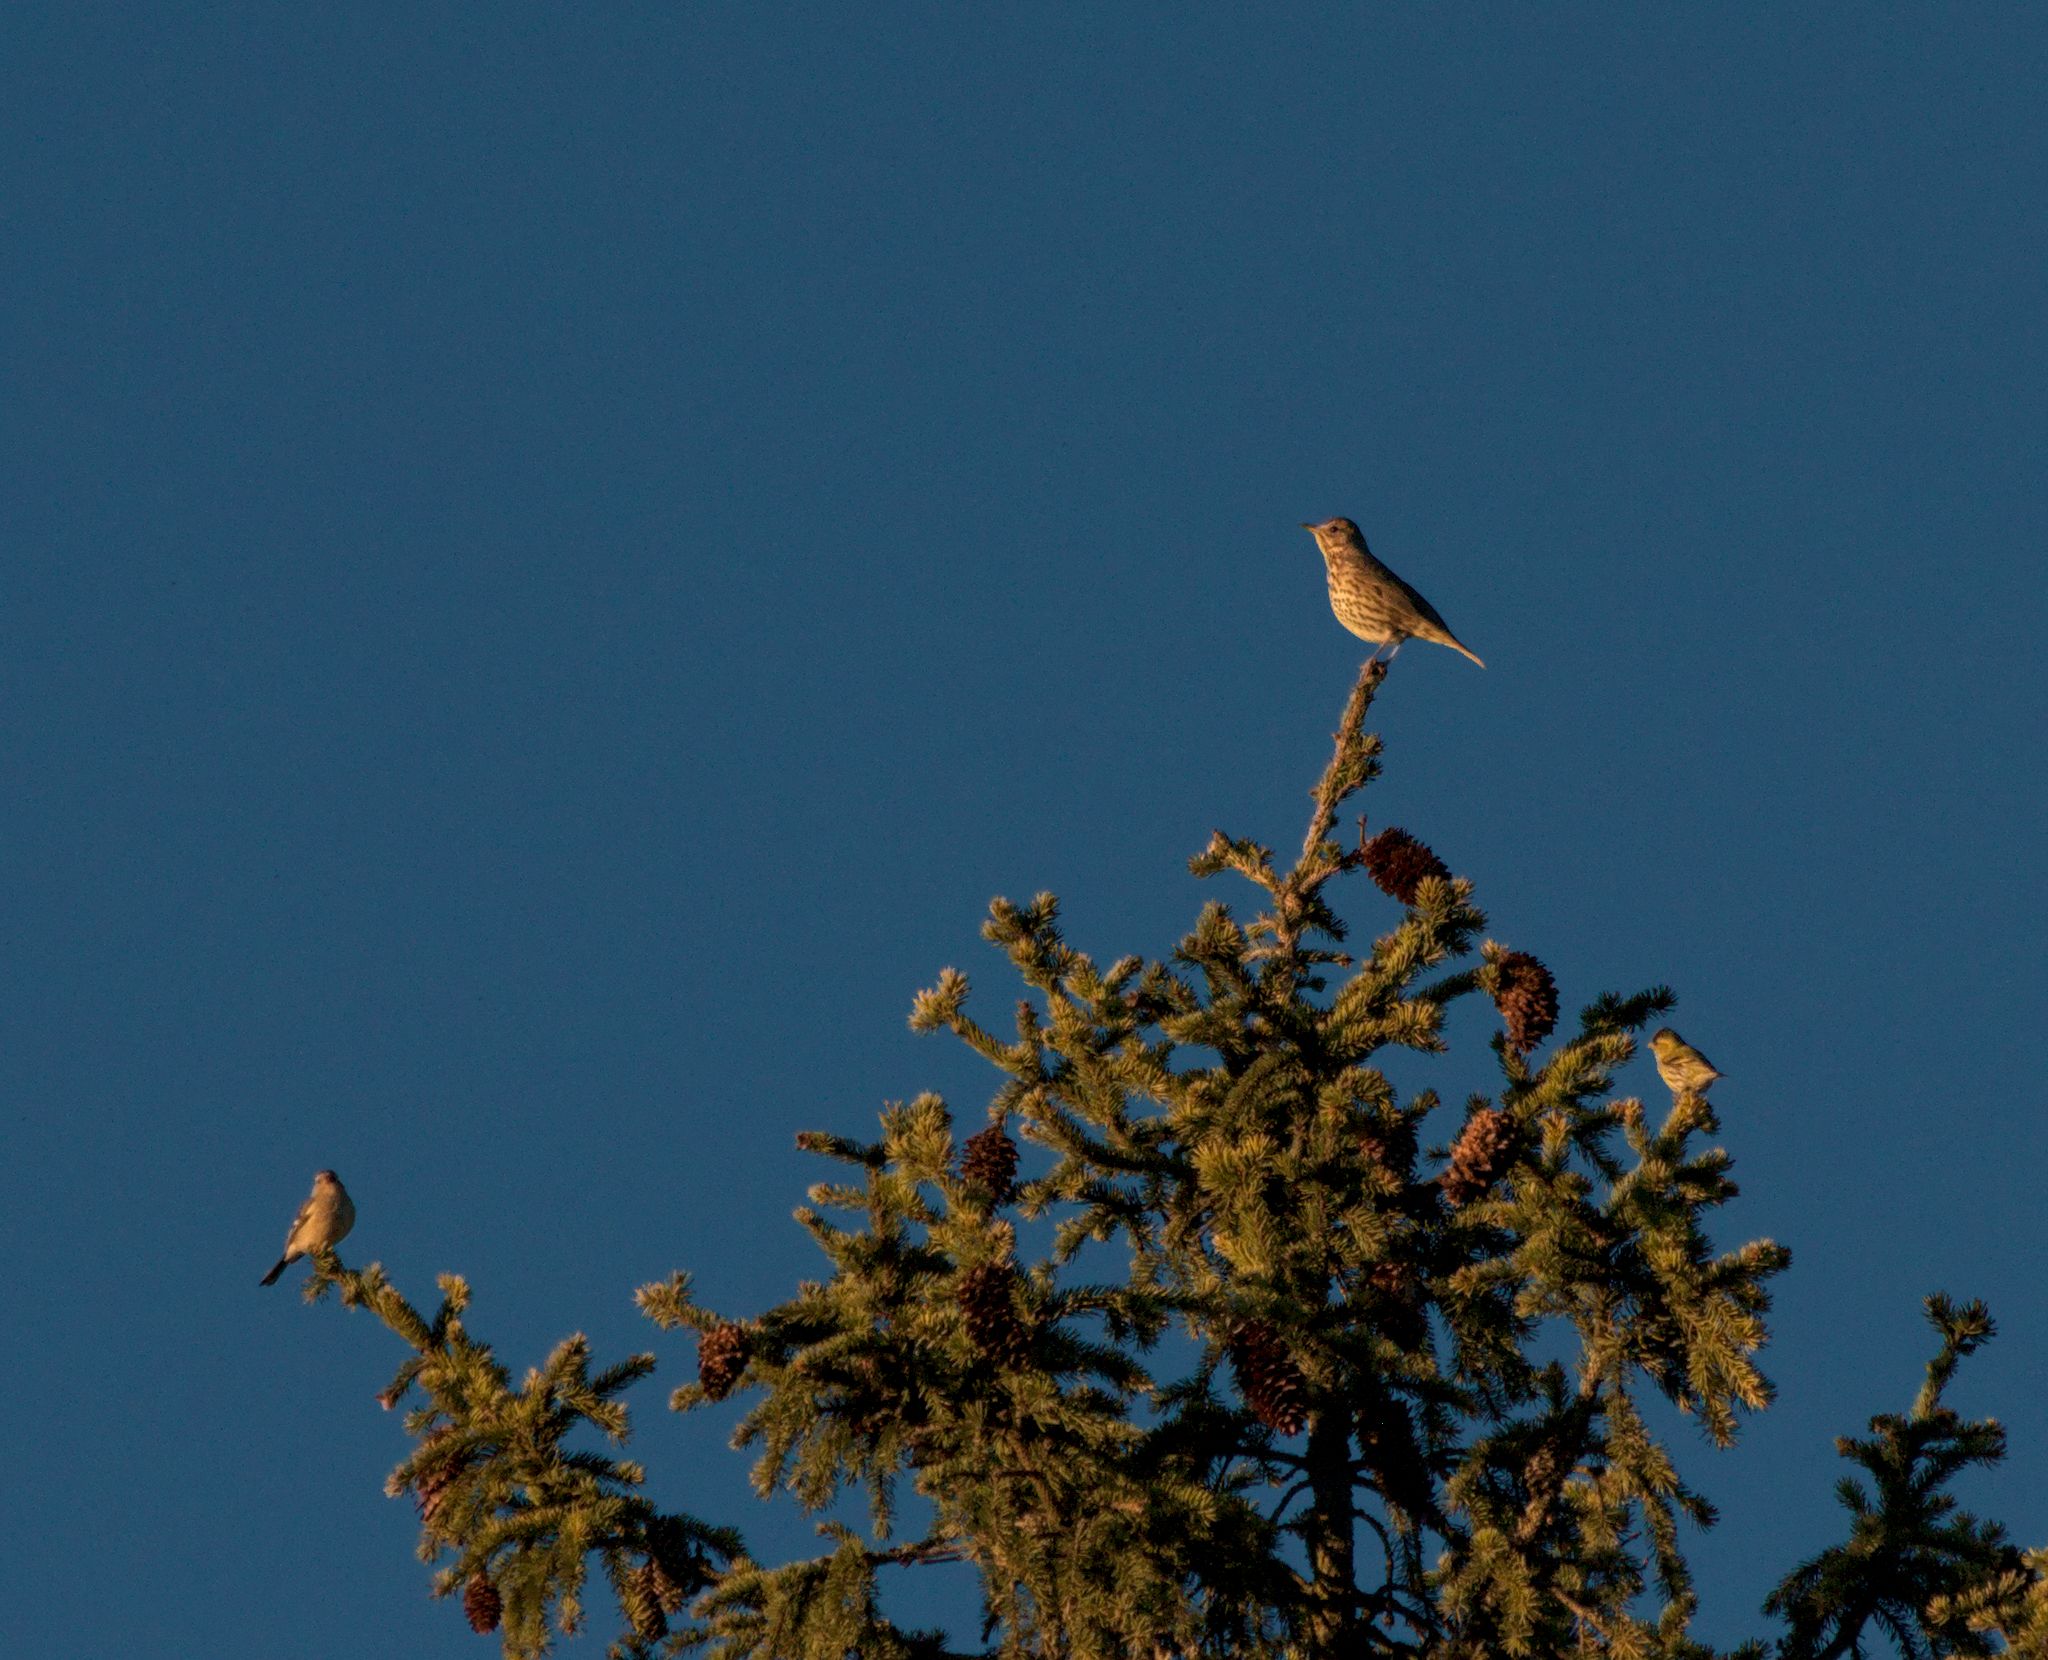
On my way back home, I spotted this bird that was sitting in the very top of a tall spruce. It was a bit larger, but I didn’t know what it was. I’m no expert on birds. It had a beautiful song and it was catching the light very well, so I took a bunch of images of it. I also saw another little bird up there that was too small to recognize.
When I got home and looked at my images on the computer an also googled a bit, I found out that the bird in the top of the tree was a song thrush (Turdus philomelos). That was very fun, because it was the first time I had seen and identified one!
The other bird I had seen up there turned out to be a chaffinch (Fringilla coelebs), and then to my surprise I noticed a third bird in the image. I didn’t know this one either, and it turned out to be a eurasian siskin (Carduelis spinus). Another first! I had never identified this one before either.
So a little walk around the neighborhood with a camera can give a lot of both exercise, exciting experiences and new knowledge. Do you have a fun experience from you local nature? Let me know down below!
From left: chaffinch, song thrush and eurasian siskin. Canon 80D with Canon EF 70-300 f/3.5-5.6 IS USM @300 mm. 1/1000 s, f/8, ISO 800
I’ve been using cameras for more than forty years now, since I was eleven years old. For almost thirty years, I shot only on film. I never had access to a darkroom, so I always had to send the exposed films to a lab of some sort and get back the film and prints. At first 9×9 cm prints from my Kodak Instamatic. Later I switched to 35 mm cameras that gave 10×15 prints.
I captured many memories, and from time to time I took a picture with a little more thought behind it, not for the memory, but to possibly make a nice picture. More often than not, I got somewhat disappointed when I got the prints back. The composition was more or less as I wanted it, and the exposure was for the most part right, but there was always something missing. The colors might be off because of the printing machine’s automatic balancing of the colors, or the details were missing in the highlights and shadows due to the limited dynamic range of the paper. Also, in cases of low light, the images weren’t only dark, but the blacks used to be lifted up to some kind of mushy grey, ruining everything.
Thankfully, I saved the negatives right from the start. Or, mostly. After the first few years I became sloppy, an much is missing from the eighties, and a bit from the early nineties. Some times a whole year or two, sometimes only a piece or two of four images out of one film roll. I have no idea how that happened, if I threw them away on purpose or if they have gone missing somehow.
So, last year I started scanning the negatives. First I had scanned many of the old prints, but I kept thinking of all the images I was not satisfied with, so I tried to scan some negatives with my DSLR. The process is a bit cumbersome and requires a fair bit of practice, but I was amazed at how good the results were when I learned how to process the images. It was like being there and taking them all over again, seeing things I hadn’t seen since the day the images were taken. Details popped out from both shadows and highlights, and images taken at night in low light could have black shadows and popping highlights. In many cases I can still remember what I was thinking when I took the pictures, how I wanted them to be, and the disappointment I felt when I saw the prints. And now, decades later, I am finally able to get what I wanted back then!
In the autumn I got hold of a flatbed scanner that could scan film, and I switched to using that. The scanning process was slower, but the scans required less processing. I haven’t yet done a proper test to find out which method is the best or fastest. That is really not relevant for this post. the point today is to show how much information is recorded on the film that got lost in the prints, especially in high contrast situations.
A real eye-opener was this image from 1988, taken with a Pentax Pino 35e point-and-shoot. Fixed focus and only automatic exposure, one of the simplest and cheapest cameras on the market at the time. First a direct scan of the print:
Then a flat scan of the negative to preserve all detail in shadows and highlights:
All that beautiful detail was hidden in the negative, and I didn’t see it until 31 years later! Then I added back some contrast and got this:
Another example is from Brighton, UK, 1992. Shot in low light with a weak built-in flash and the same Pentax camera, it shows what often happened to underexposed images. The prints were lacking color and contrast, and with porridge-like shadows.
Scanning the negative and then processing the resulting image gave me something much more realistic:
So the tip of the day is: If you want to rediscover your past, get your negatives scanned! You’ll most likely discover some treasures.
I haven’t been out taking pictures much lately, and even less showing new images to the world. Yesterday I finally pulled myself together, got up early on a Saturday and headed to a local woodland. It felt great. When I returned home after a few hours, I was refreshed and exited like I hadn’t been in months. I have had too much other stuff on my mind, so there just hasn’t been time. Or rather, I haven’t got my priorities right. I have had too much to do at work, I have spent a lot of time scanning old negatives (more on that in the next post, stay tuned!) and I am trying to sell a house in a slow market.
But after yesterday, I decided that I need to do more of all the things I want to do but postpone all the time:
So what was the outcome of yesterday’s little adventure?
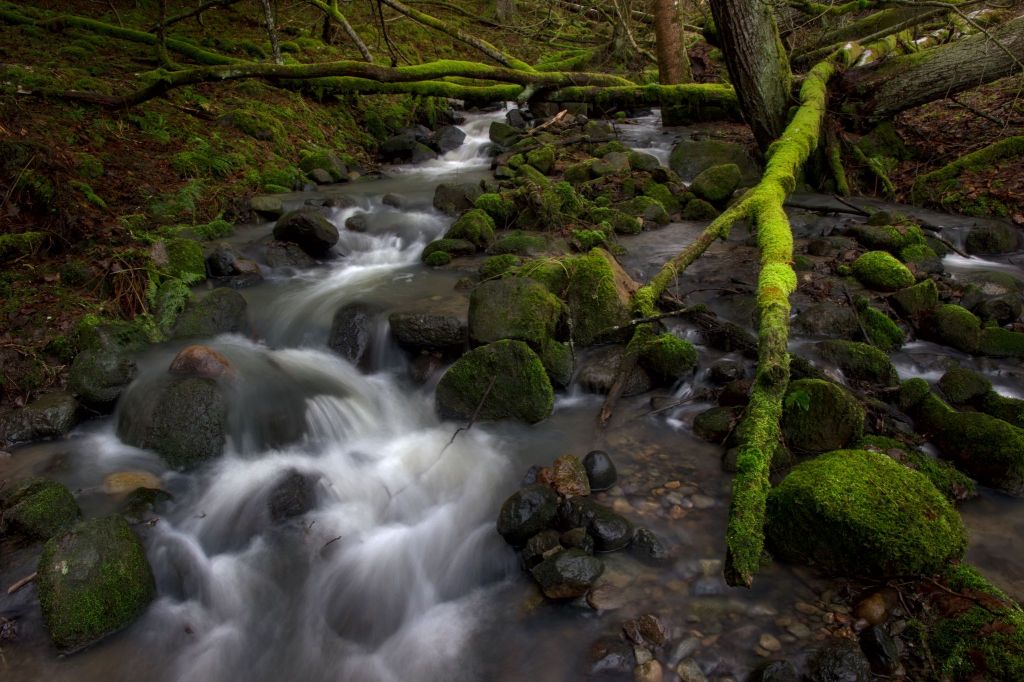
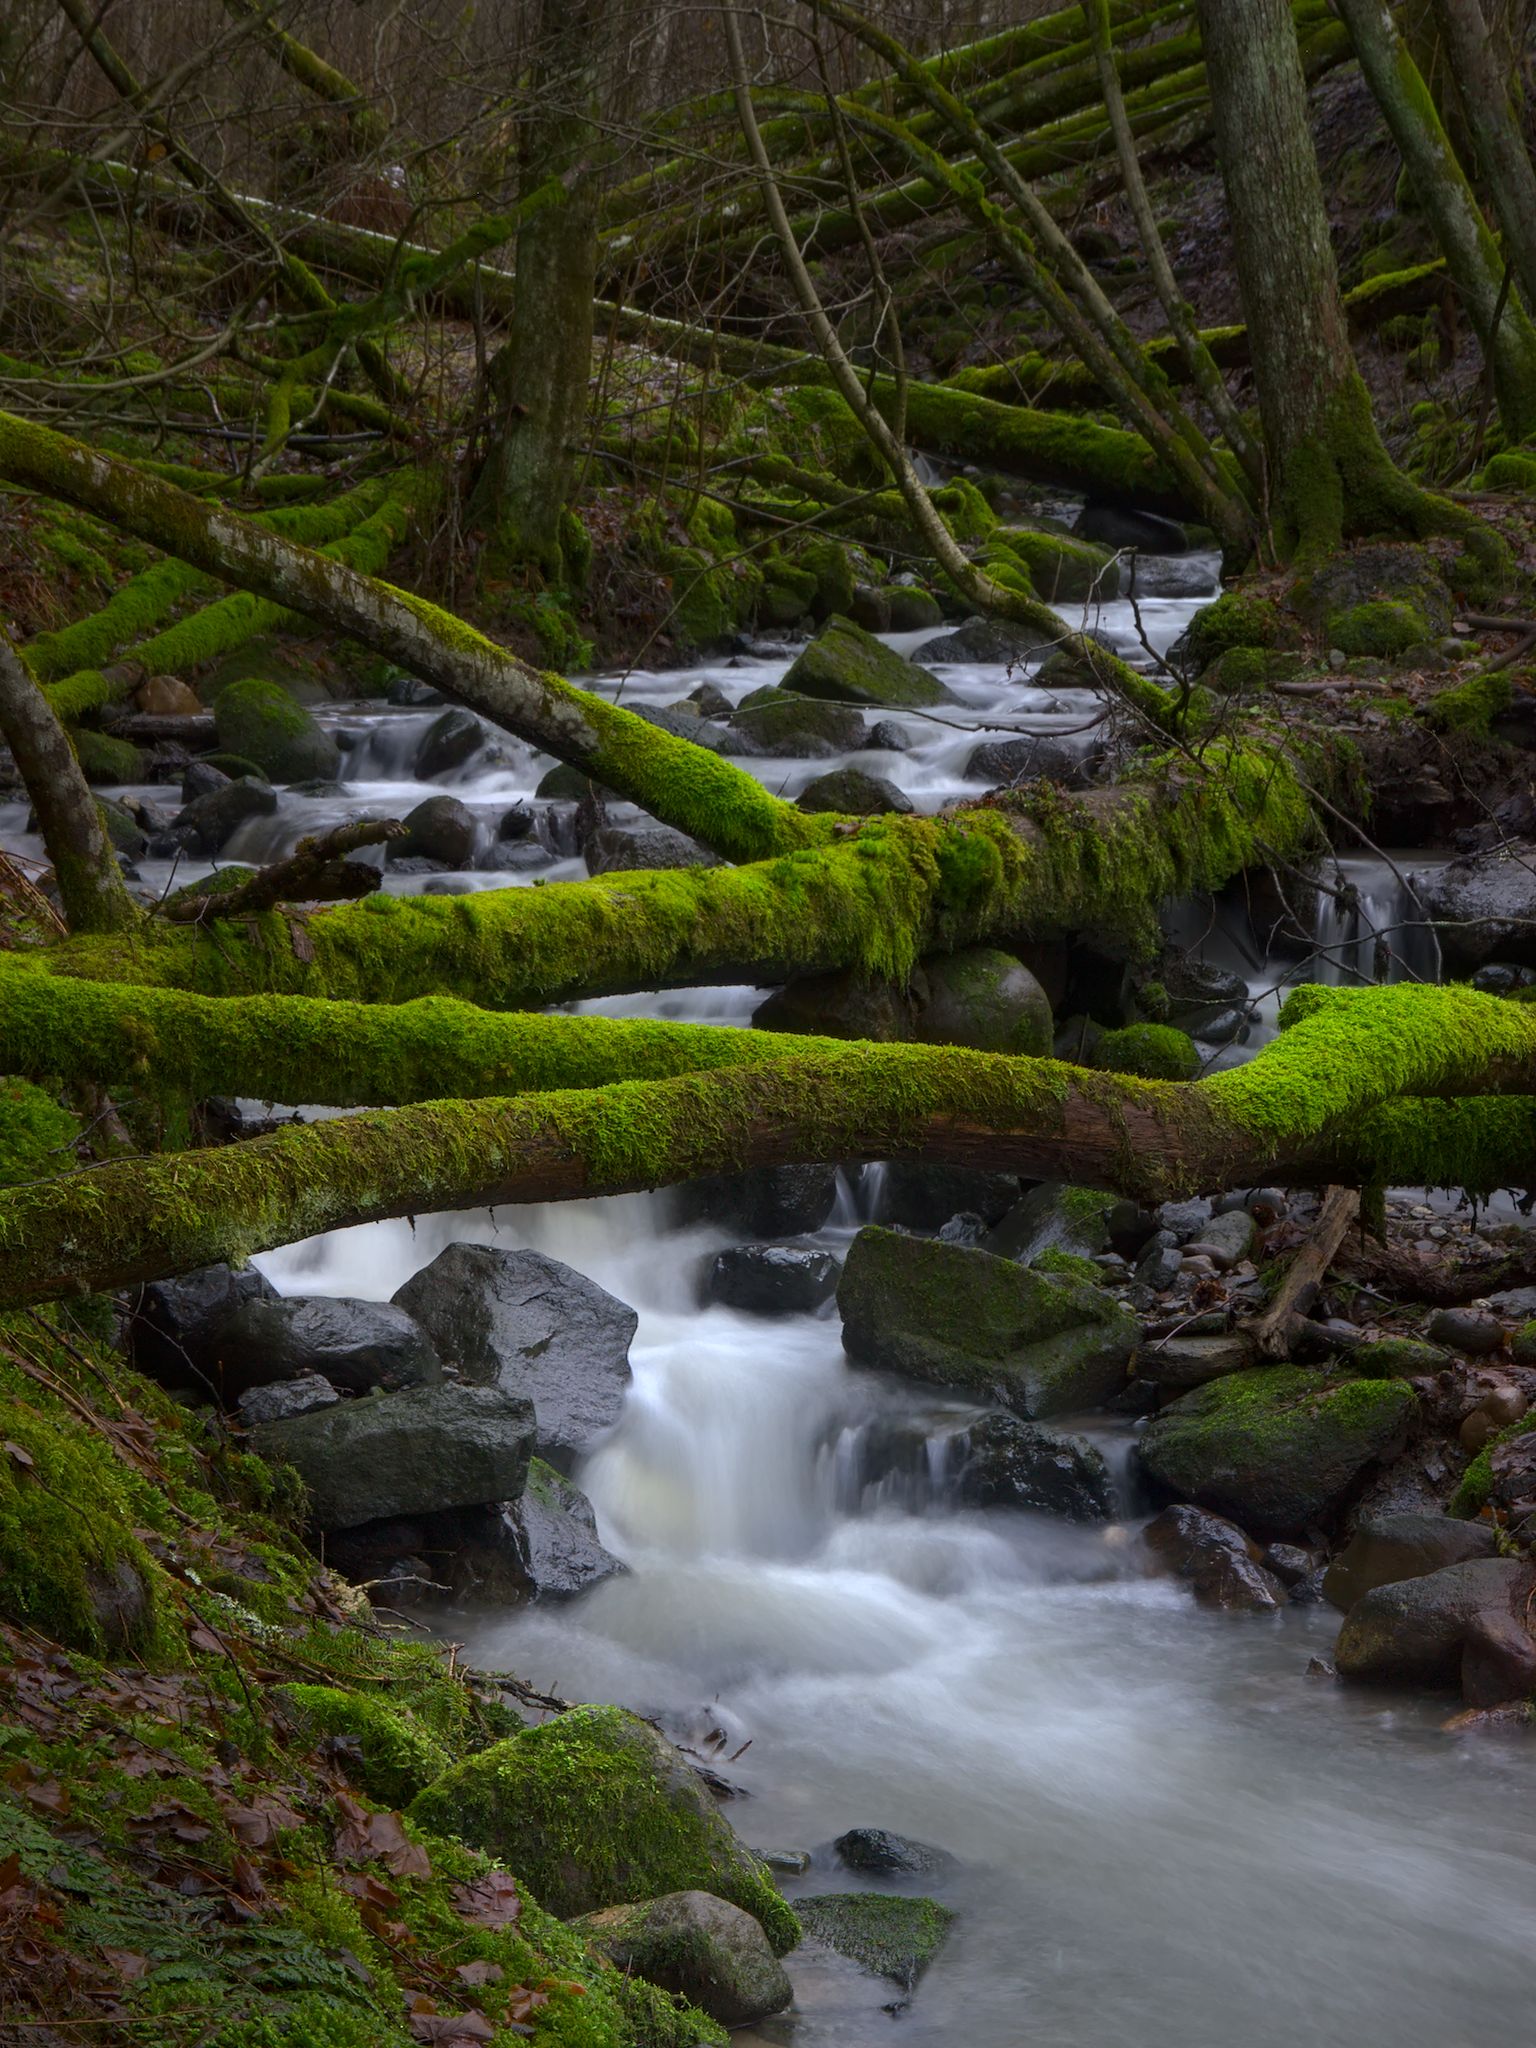
There is this little valley with a stream running through it. The stream is eroding the banks, and trees growing along the stream sooner or later loos their foothold and fall over. The trees are left to themselves, crisscrossing the stream, and this creates interesting patterns and lines. By taking care to leave the sky out, I am left with a certain minimalism in the chaos, where the compositions are dominated by the white water and mossy, green tree trunks.
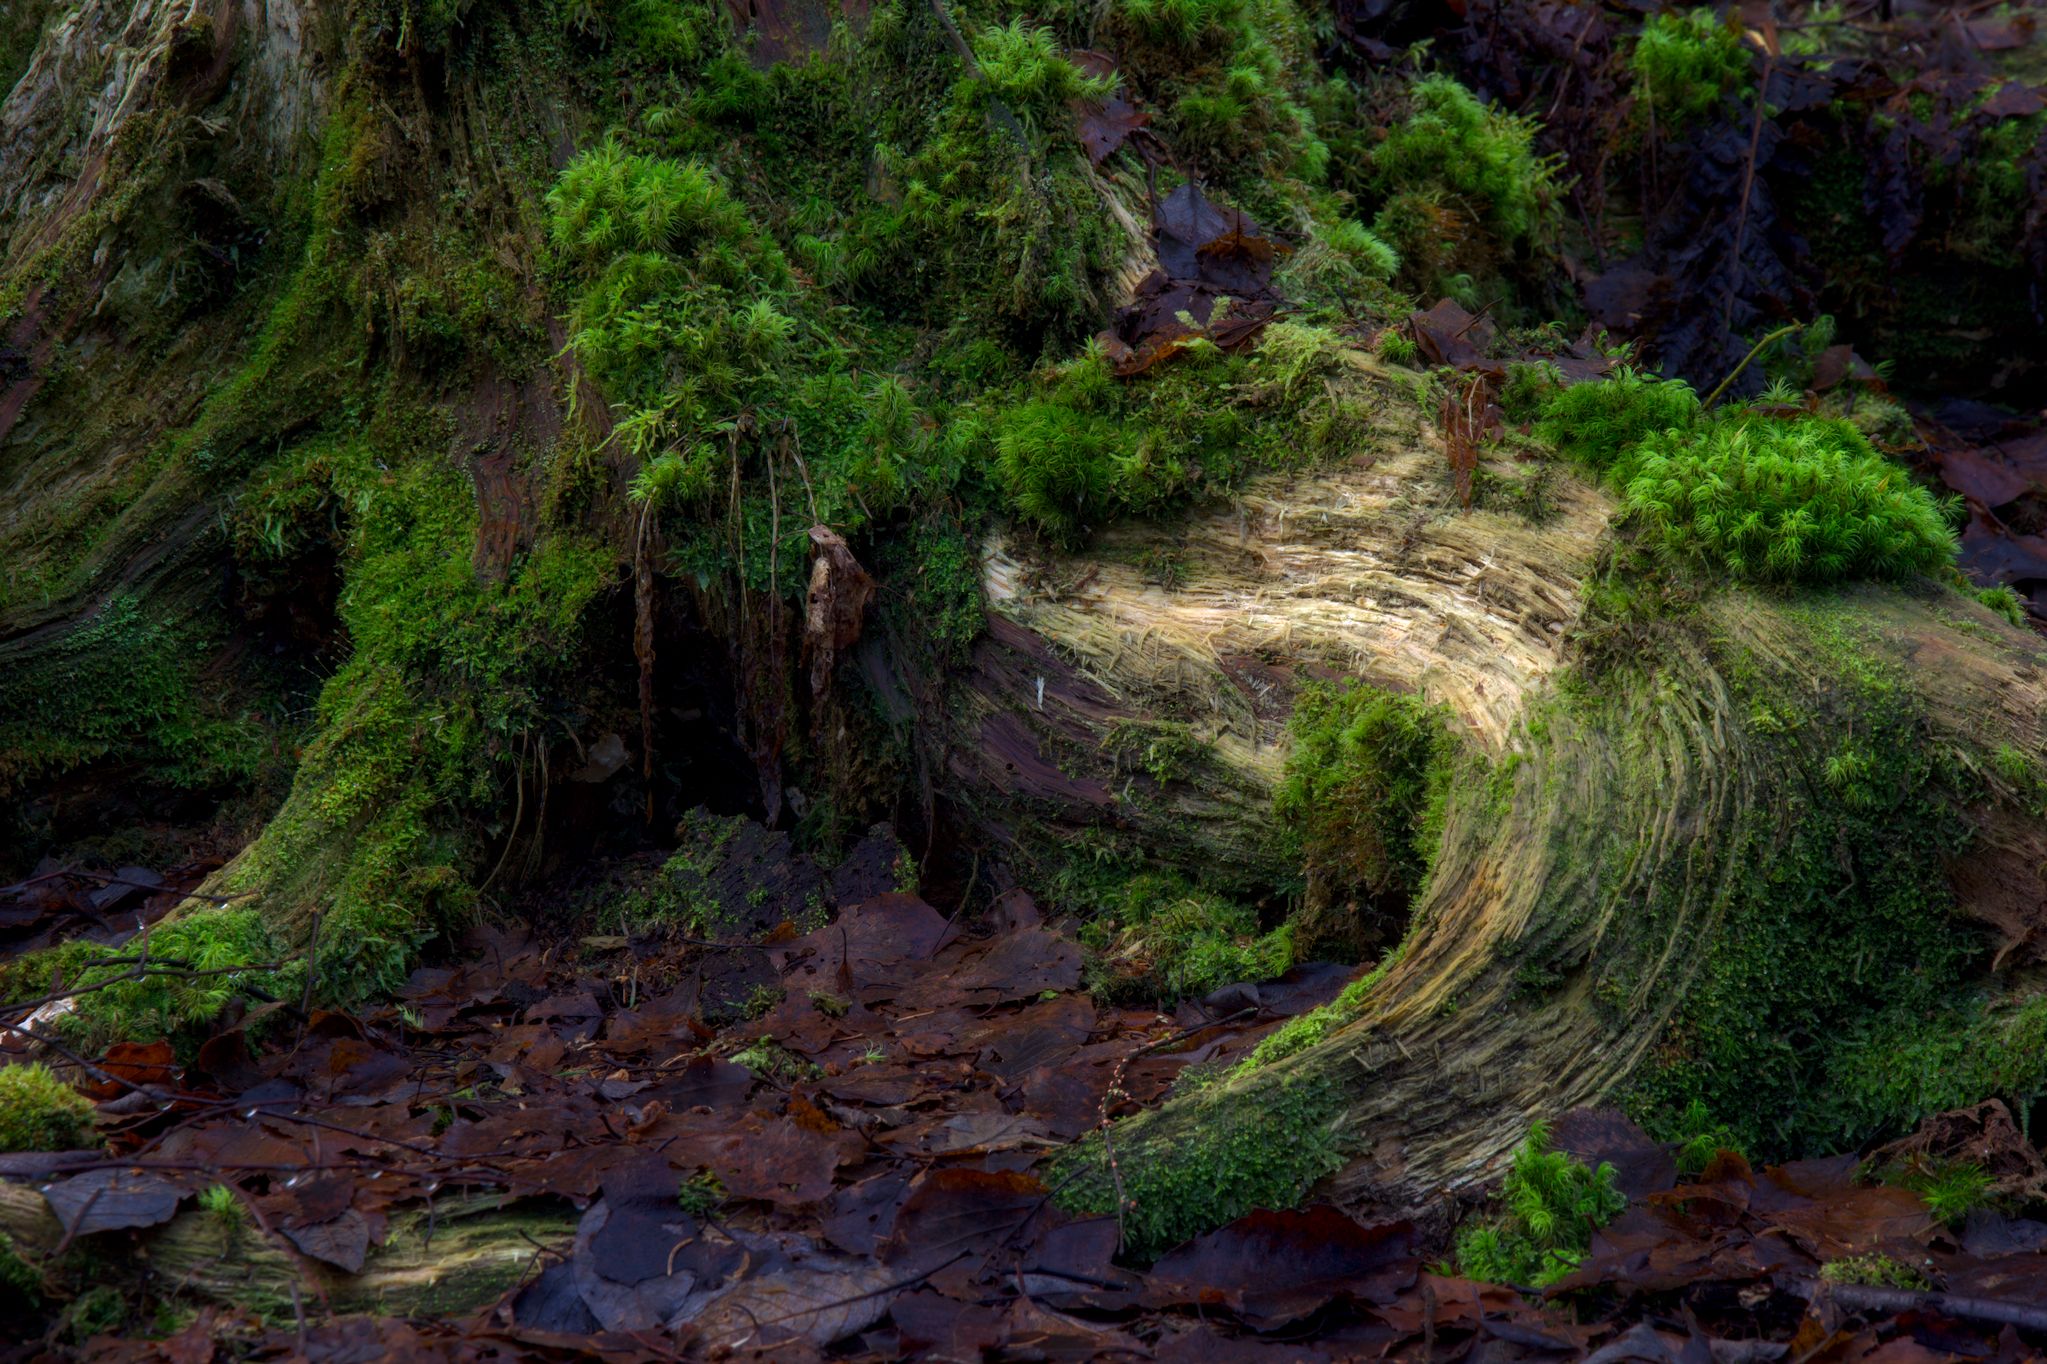
I also have a certain fascination for old, rotting tree stumps. They often contain a fantasy world of their own, with miniature landscapes and interesting shapes. If I find the right one, I can spend hours exploring it.
I found this one on my way back to the car. I had packed my gear, but I couldn’t resist. I especially love roots that are creeping out above ground.
I circled it for a while, trying to reveal its secrets. Then I noticed an animal’s legs:
So what is your winter like? Is it like it should be in your part of the world, or is it like here, more like two or three months later? We should have a whole lot of snow and temperatures well below freezing, instead we’ve got this.
I’d love it if you check back soon for more, I promise to make more content in the future than I have done lately.
Many of us who have lived for a while have lots of old negatives lying around in drawers and boxes in the back corner of a closet. And many of the younger generation have recently discovered a “new” kind of photography: Film photography, or analog photography as they tend to call it. Digging out their parents’ old cameras and loading them up with a very limited amount of “memory”, and no chance to see the result until the film is developed.
Once the film is developed, either by yourself or by a professional lab, you might want to get the images onto your computer, to let them into the modern world of image processing, archiving and sharing on social media. The quick and dirty way would be to let the lab do this for you. The fun way is to do it yourself. This is where darktable comes into play.
I admit that darktable may not be the easiest application for converting negatives. For me, at least, it seems to be the best solution all in all, especially since it is a one-stop shop for the whole process from capture to finished image, and also because it is the RAW developer that I know the best.
Capture
Capturing the images can be done in two ways, either with a scanner or with a digital camera. So far I have had the most success with using a camera, and this is also the way that makes darktable a true all-in-one solution.
I start with tethering my camera to my computer. That way I have the Live View on the computer screen, so it is easy to check focus. This is essential, as we are working with a very narrow depth of field. It also allows me to trigger the camera with a mouse click, so I don’t have to touch the camera and potentially introduce camera shake and misalignment. And last but not least, I get the images directly onto the computer hard drive and imported into darktable, ready to be processed. To learn about tethering, go and watch this video:
There are many ways to do the actual capture, and I won’t go too deeply into them here. But you need a light source to shine light through the film, you need some way of holding the film in front of the camera, and you need a stable camera. You can see my own DIY solution in the video at the end of this article.
Benefits
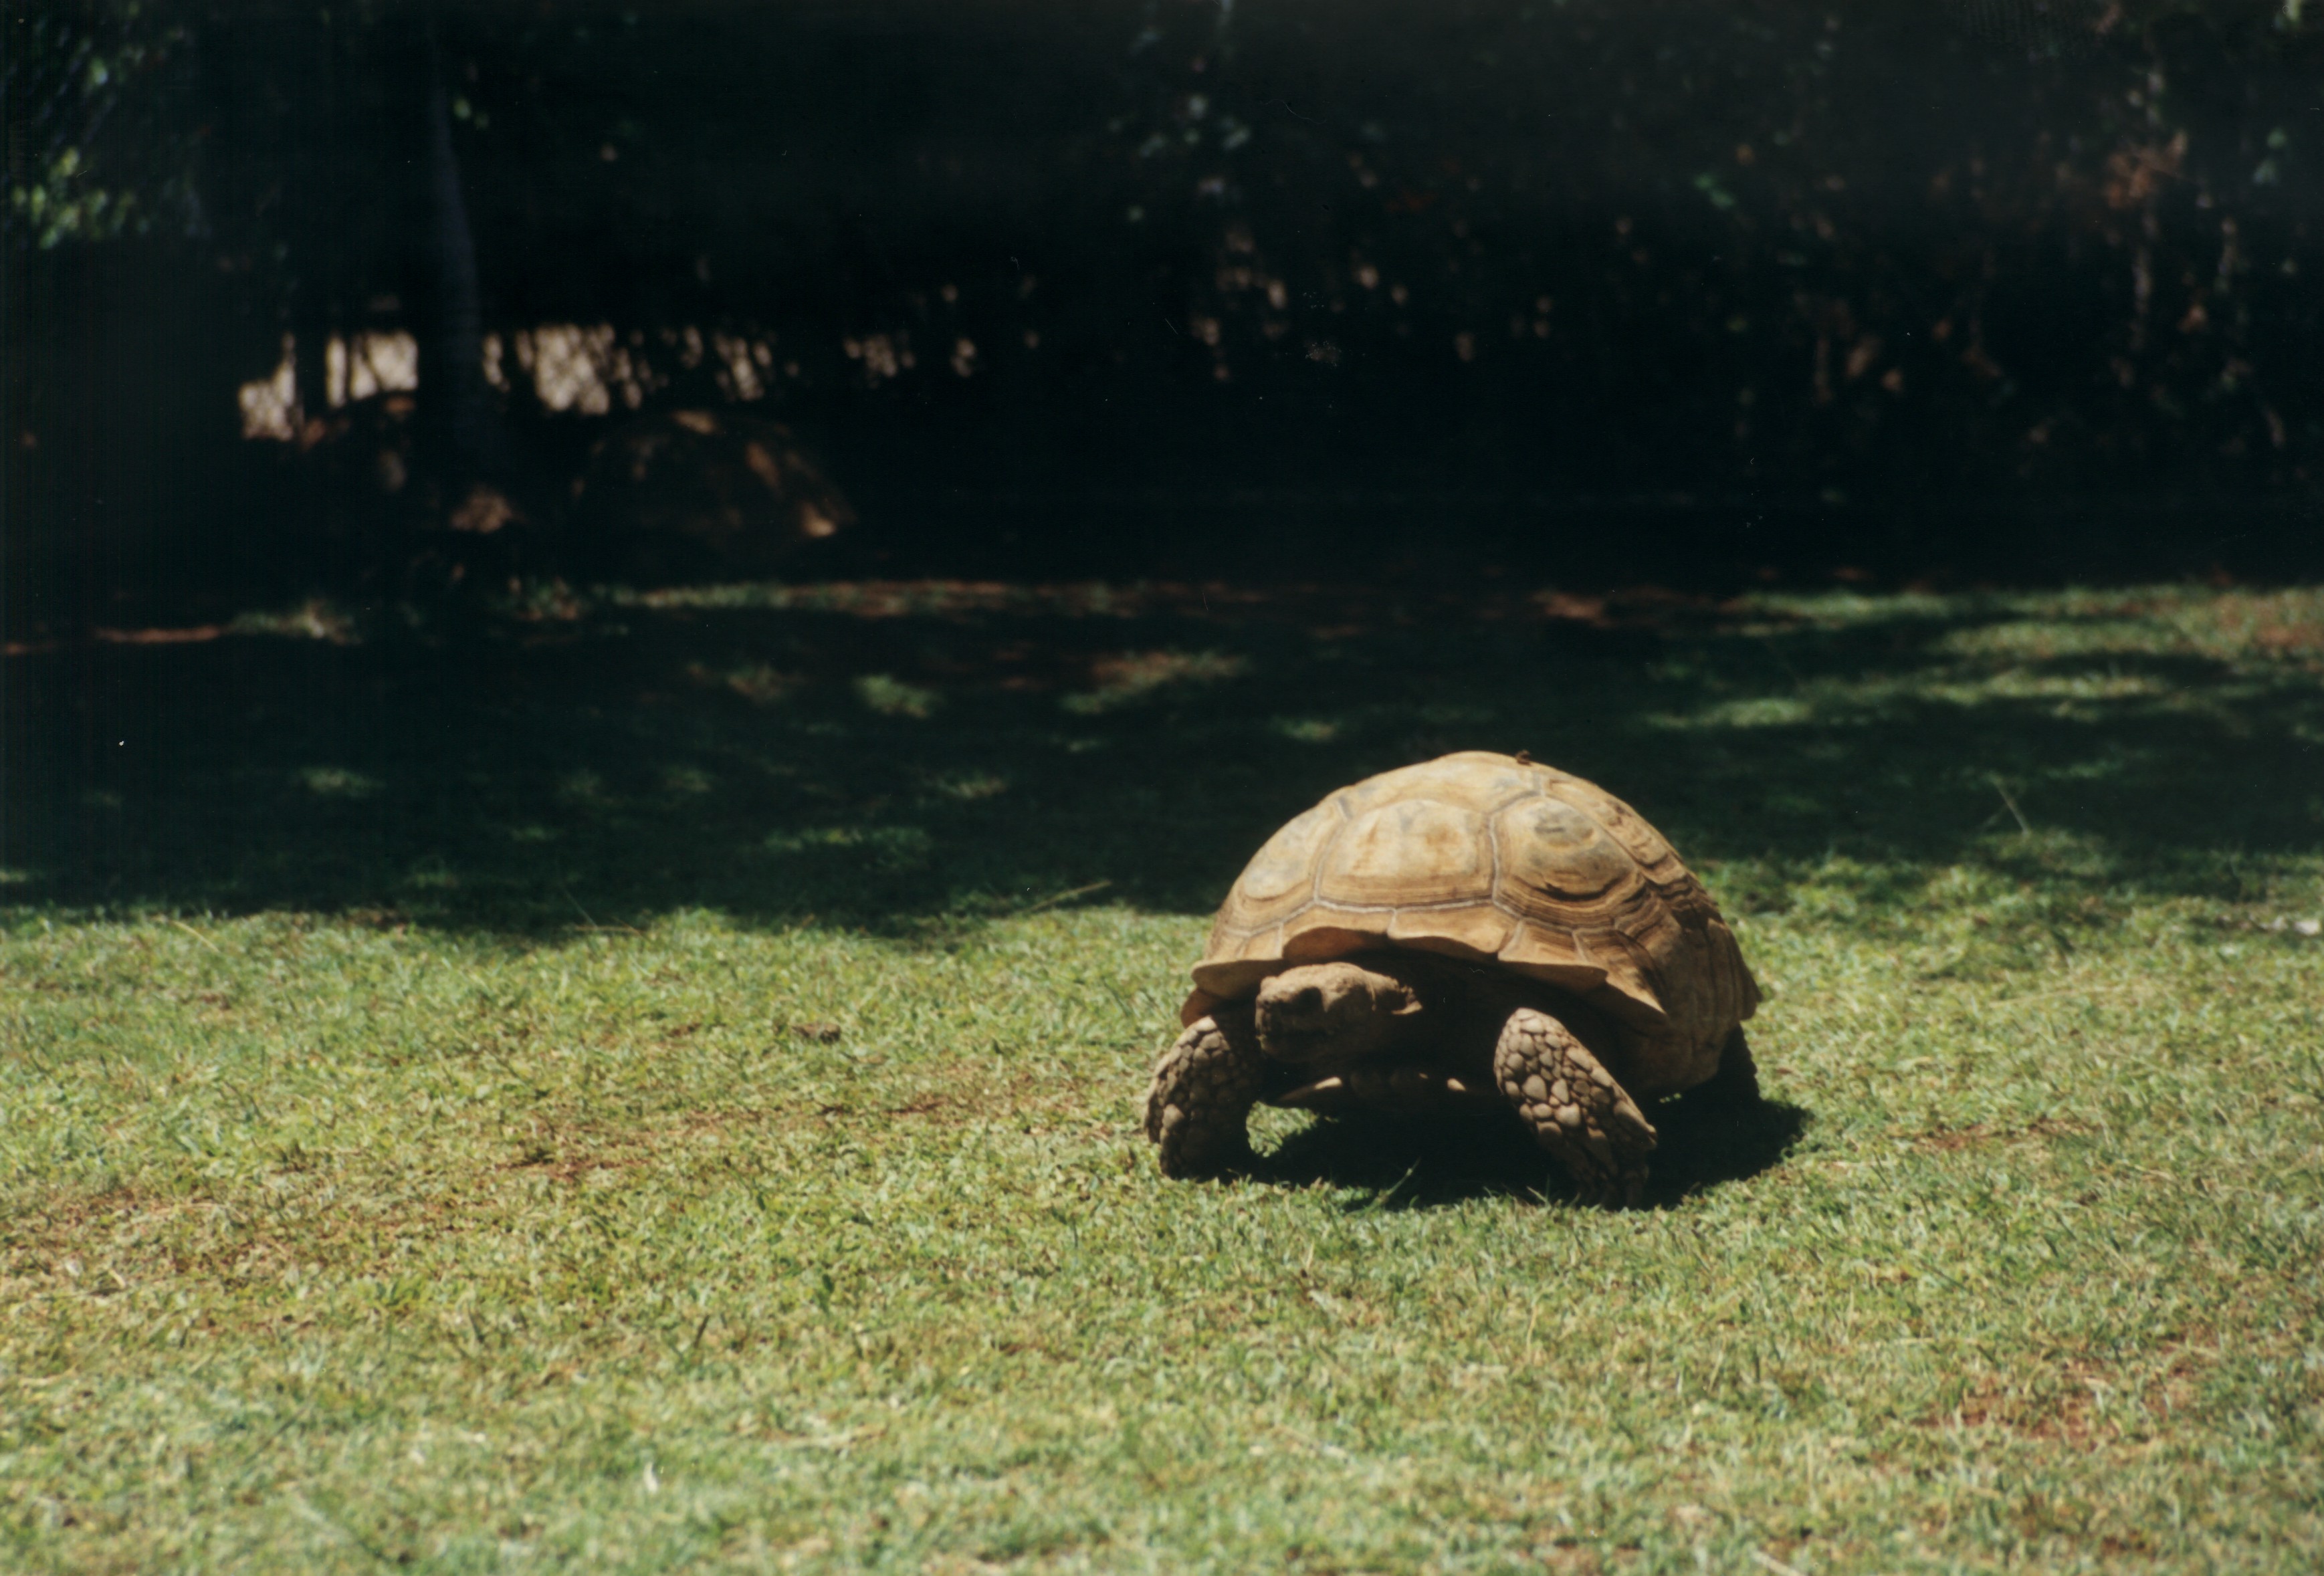
One of the great benefits of digitizing negatives is that you will get access to all of the information in the film. I remember I was often disappointed with the 10×15 cm prints I got from the lab. They were what they were. I had no control over the image after the shutter was pressed, and the limited dynamic range meant they often lacked detail in the shadows and highlights. When digitizing the negative you are in full control, and you can see just how much more dynamic range the film has. I’ll give you an example. The following image of a Galapagos Tortoise was shot in Honolulu Zoo on Kodak Gold 200 film. First the scanned paper print:
You can see all the detail in the shell, but who knows what is lurking in the shadows?
Then from the digitized negative:
Two more tortoises are relaxing in the shadow back there. And with a little more effort if I wanted to, I could have increased the local contrast to get even better definition in the shell of the main subject and in the sunlit grass. The point is, all the information is there, and you can do wat you want to it.
Well, I won’t keep you here any more, watch the video and then go and digitize your own negatives.
If you haven’t read Part 1, please go ahead and do so here.
When I packed up and left the location of my sunset shoot, I had this idea that I might get the chance to do some star photography during the darkest hours of the night. But as the night progressed and I was awake quite a lot of times (if I ever really slept in the first place), I saw that it never became dark enough. At the most I could see a handful of stars, so there was no point in getting out and trying.
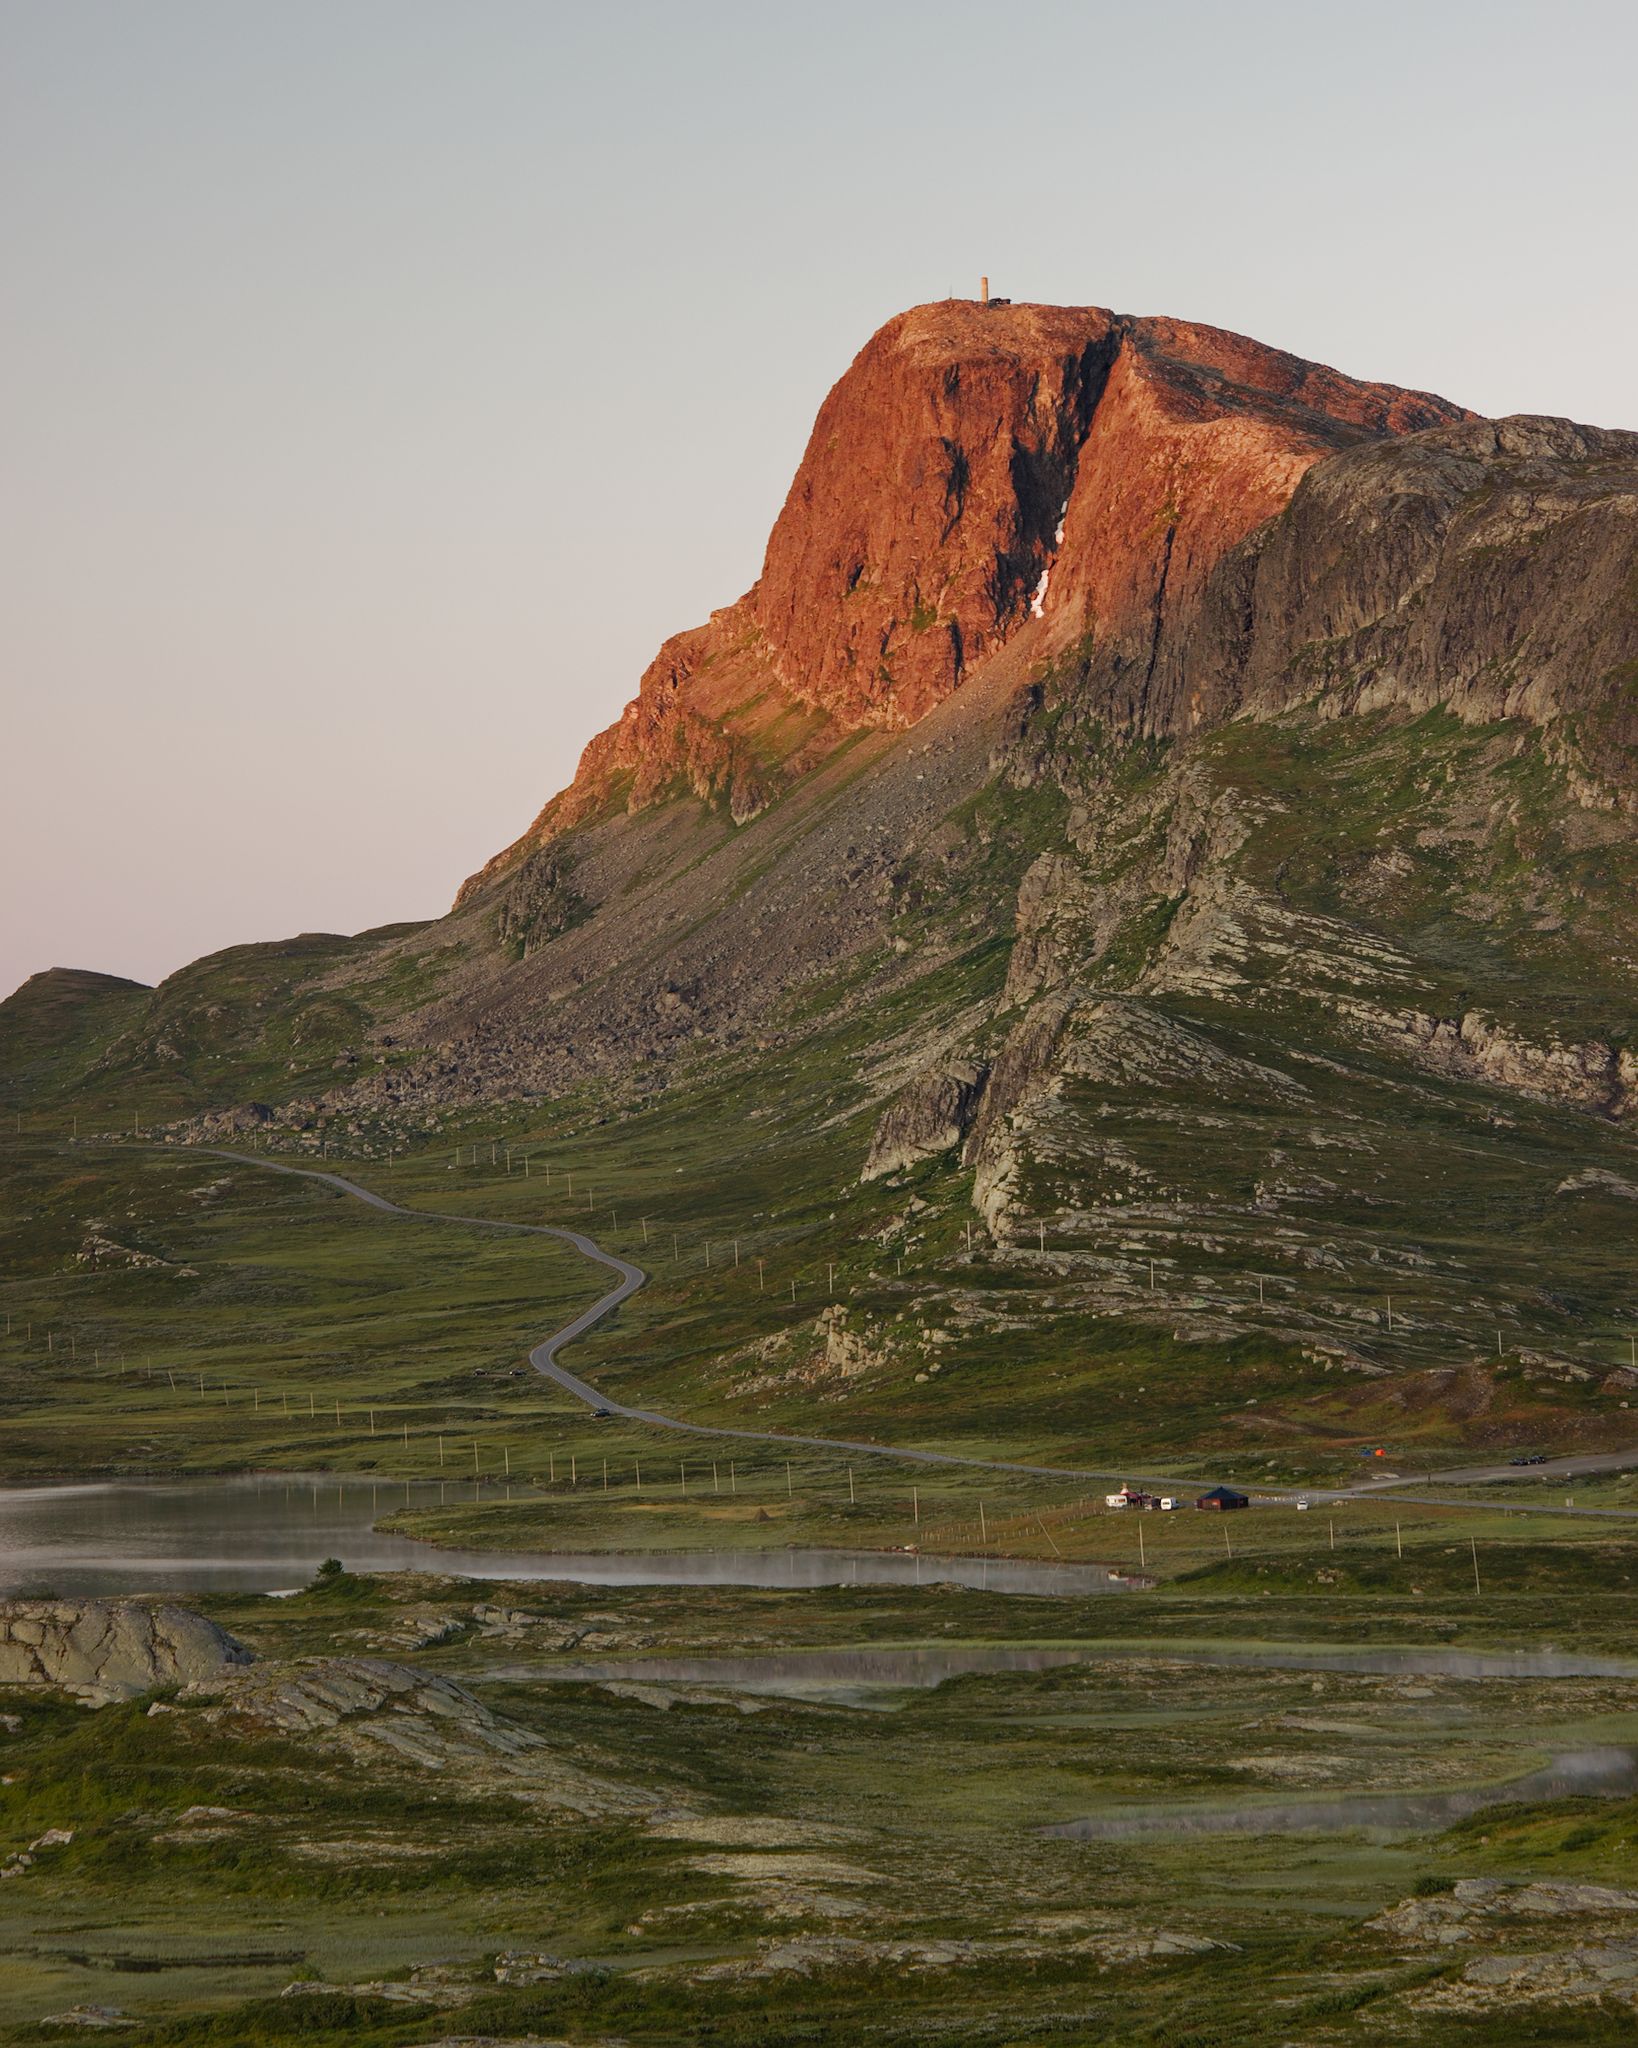
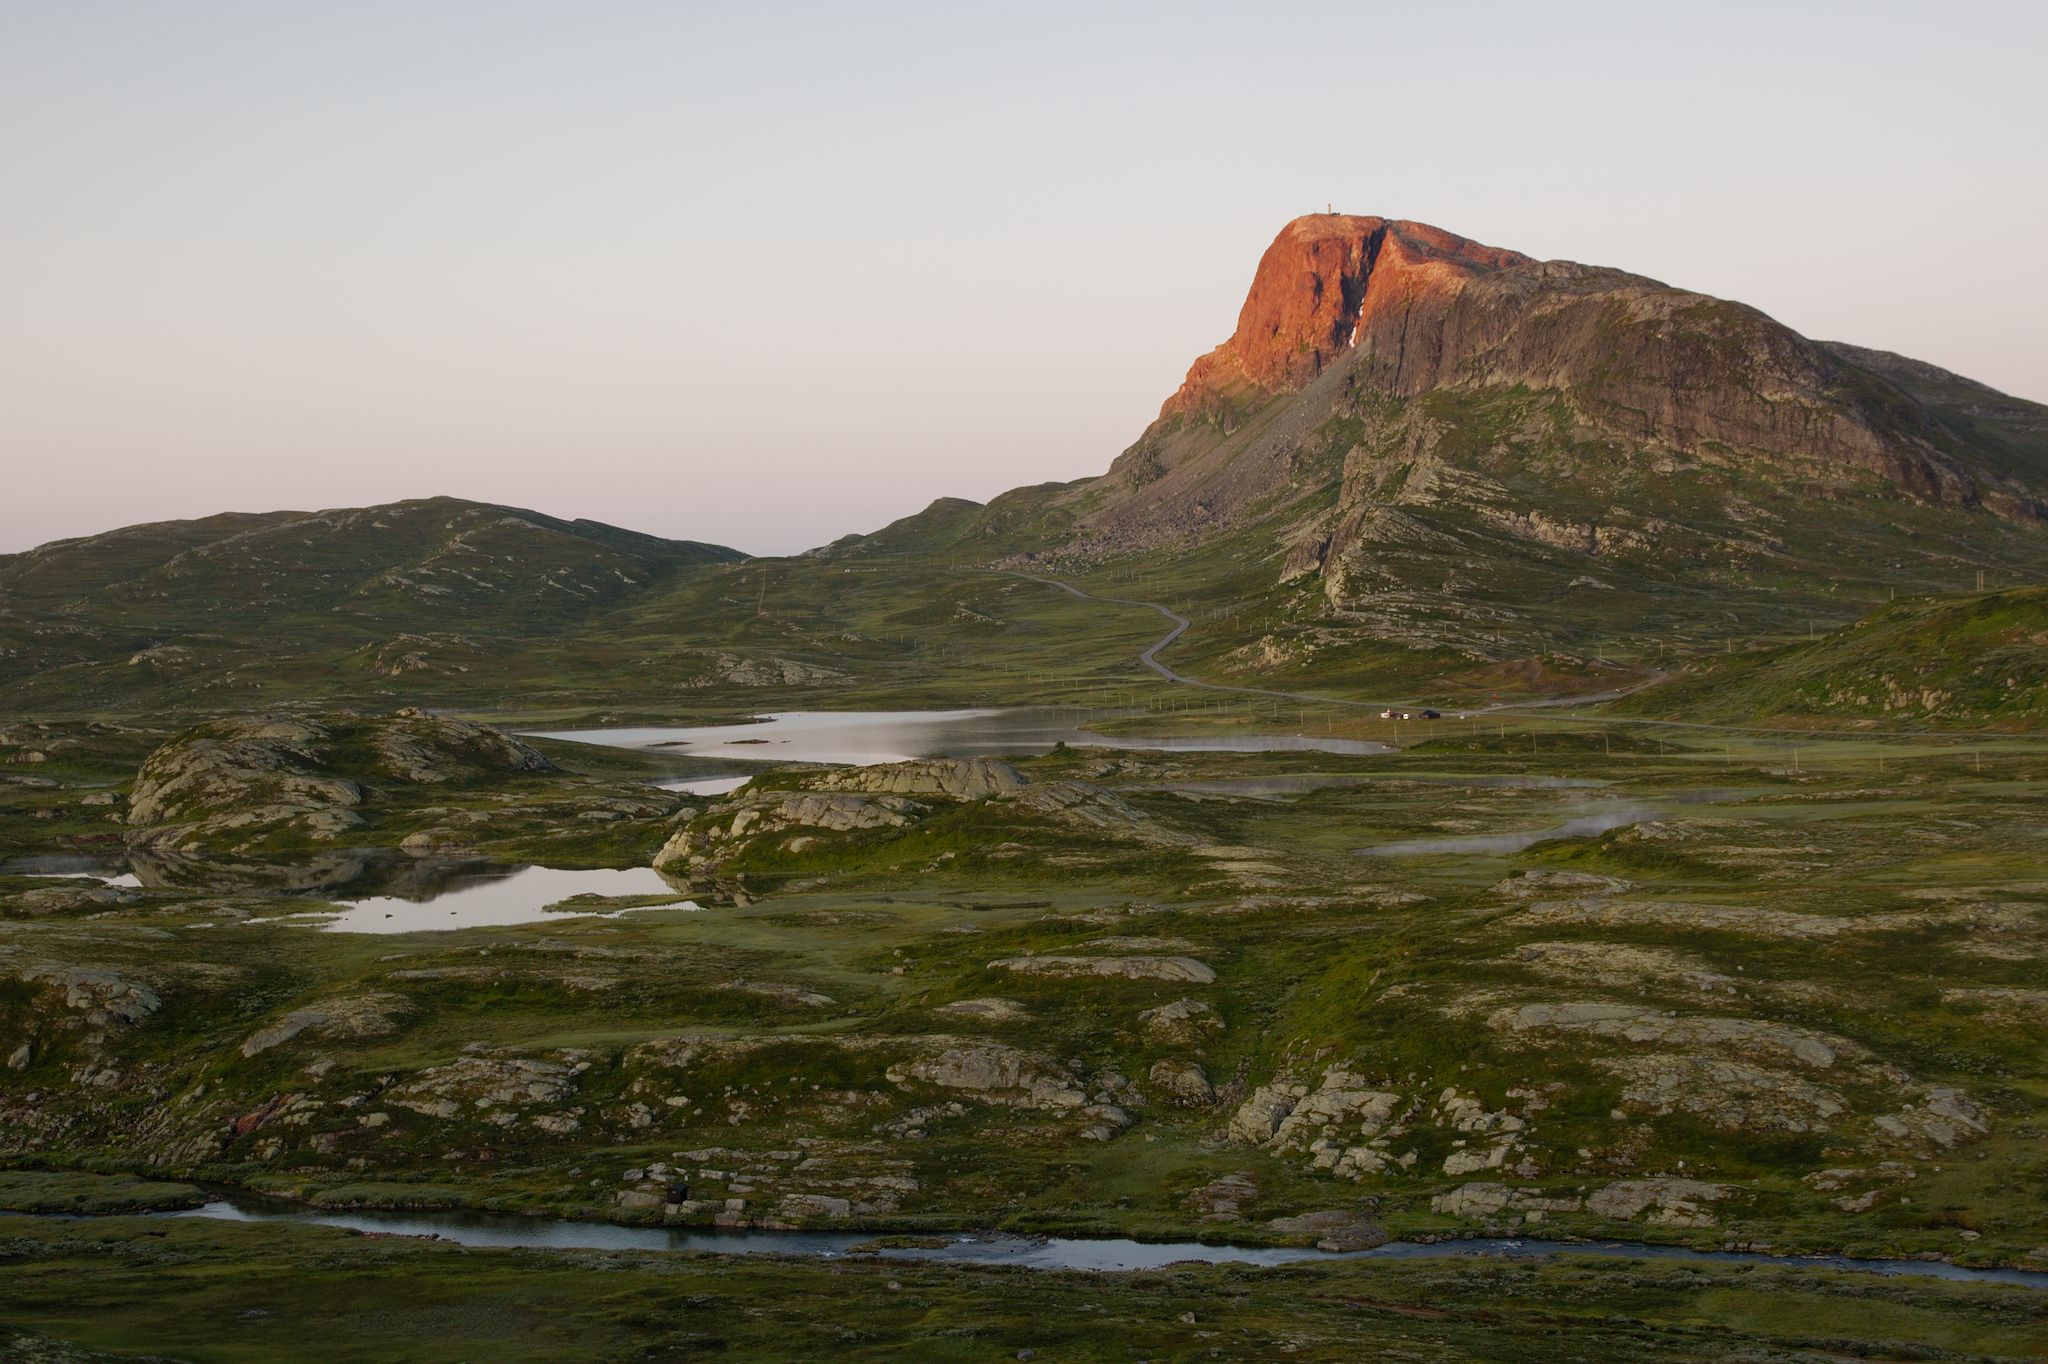
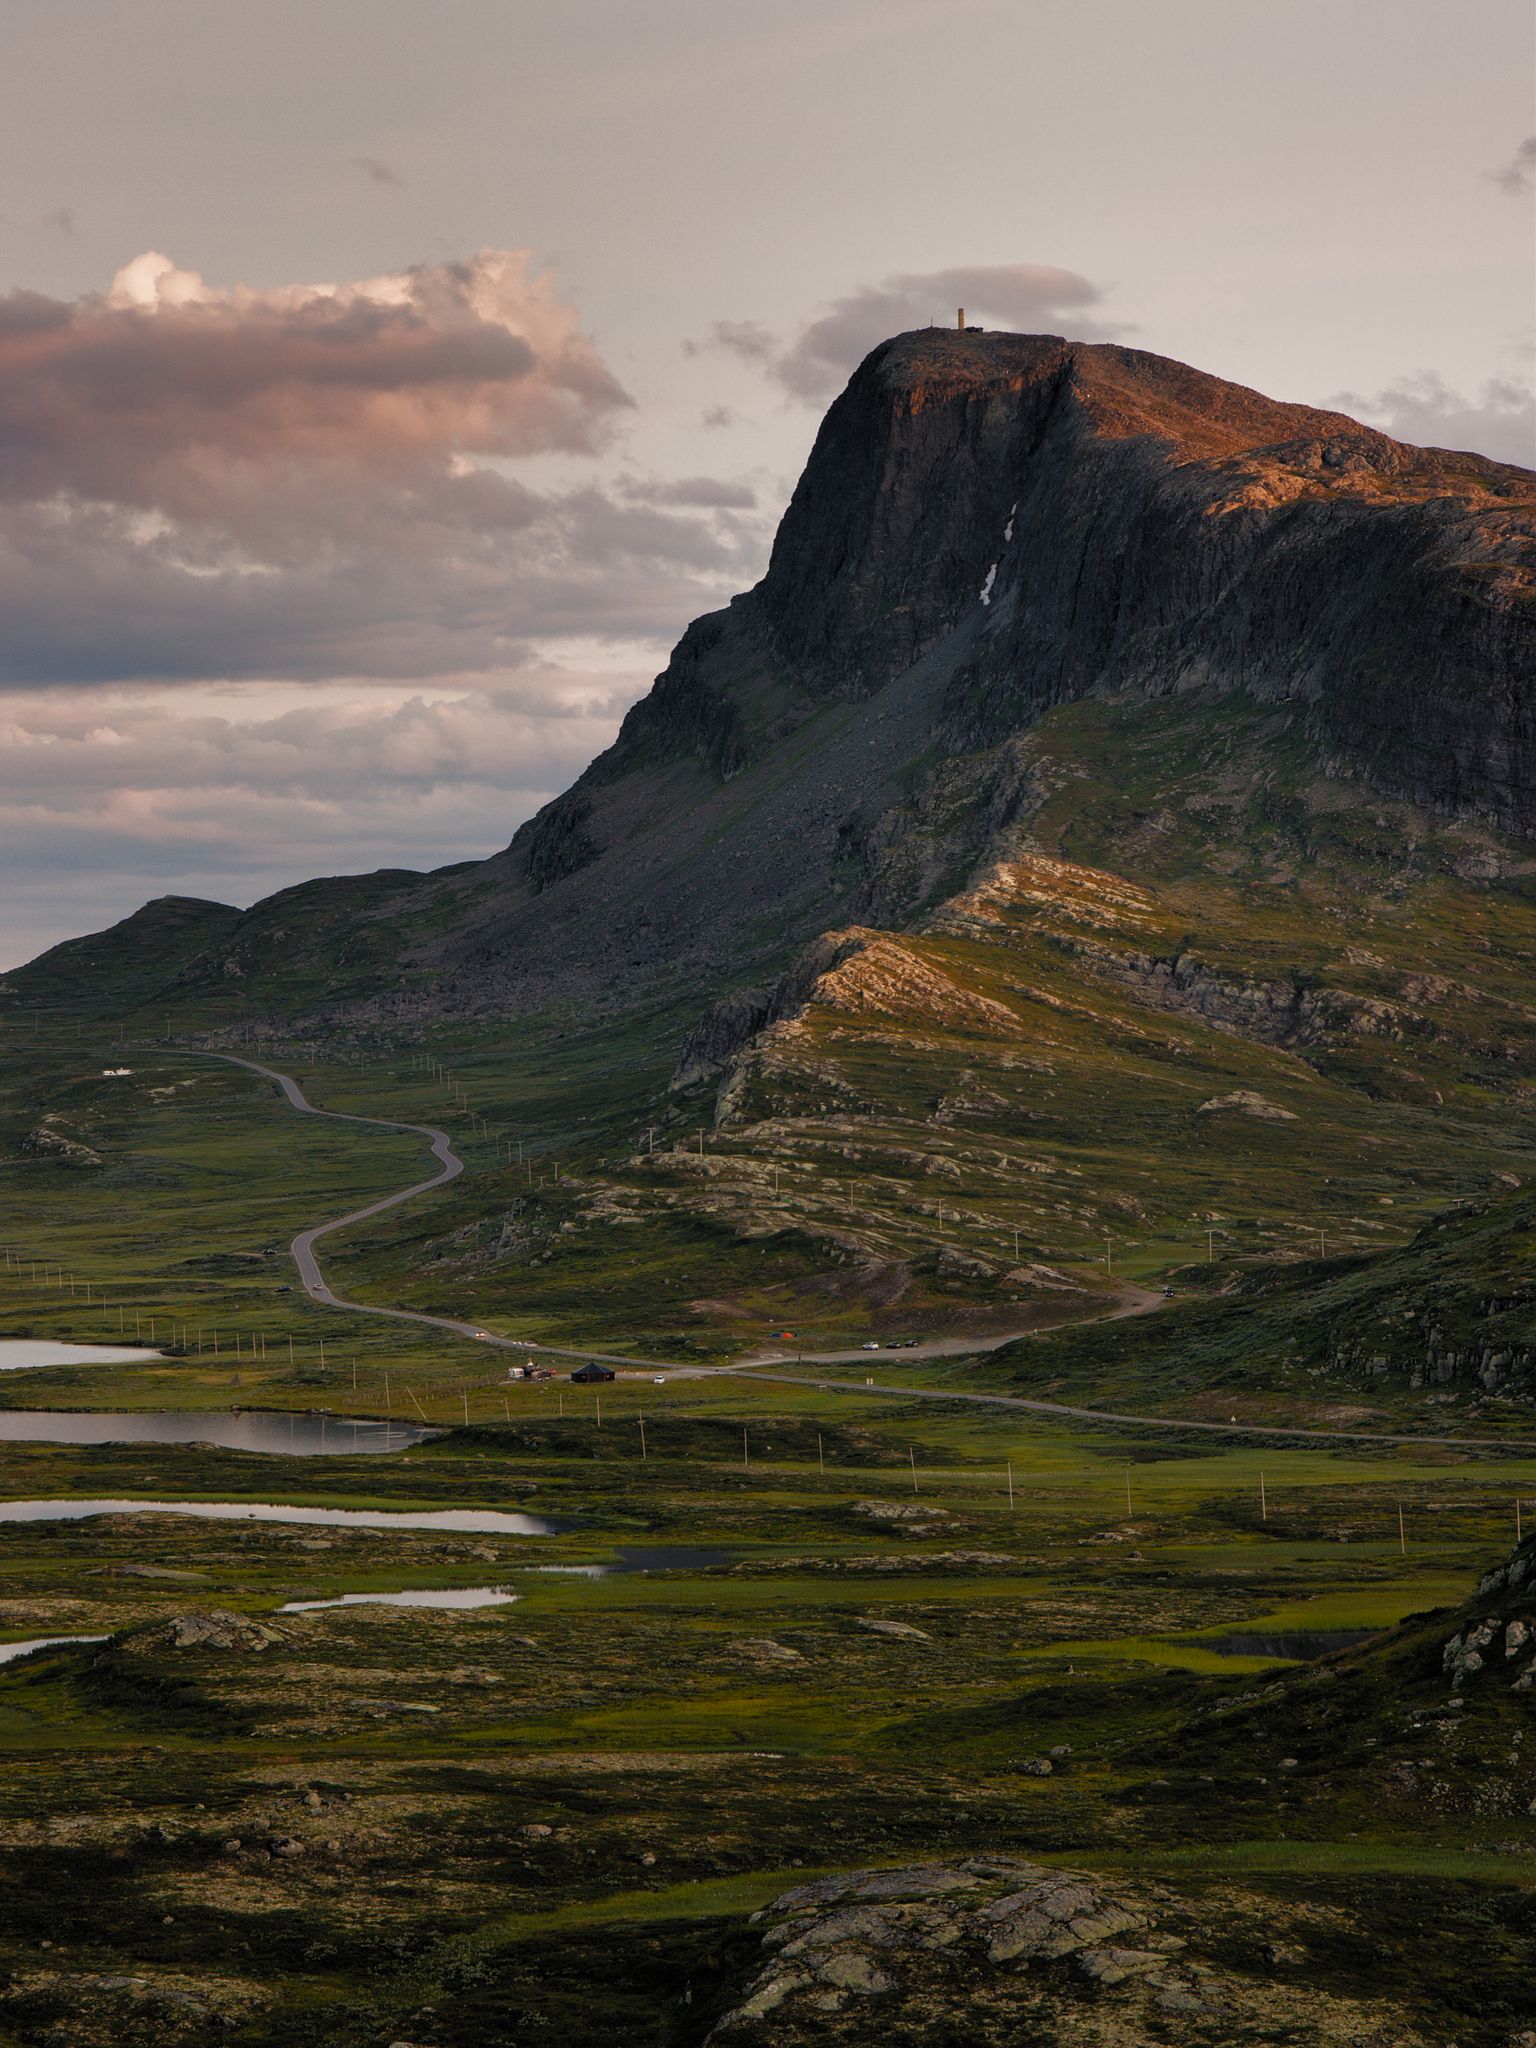
Around 4 am, I drove back to where I was the night before, and I set up at the same spot. I wanted to get the first sunlight on Bitihorn, and also a shot of Bygdin and the distant mountains behind it. A sunrise was right around 5 am, I had plenty of time to find my compositions. Unfortunately, there were no clouds, only a quite hazy, cloudless sky. Therefore I needed to include more ground than sky. I settled on two compositions of Bitihorn, one quite wide and one more tight.
I could not see the sun directly from my position, so as the sun rose, I had to take several shots just in case the light would be blocked by a cloud just at the right moment. But I was lucky, the sky was just as cloudless in the North-East as it was in the South and West. In the end, these were the two keepers, one of each composition:
Bitihorn sunrise, tight version. Canon 550D, Canon EF-S 15-85 mm f/3.5-5.6 IS USM @67 mm, f/8, 1/5 s, ISO 100
Bitihorn sunrise, wide version. Canon 550D, Canon EF-S 15-85 mm f/3.5-5.6 IS USM @28 mm, f/8, 1/5 s, ISO 100
Which one do you like the most? Let me know in the comments. I’d also like to know which one is your favourite from my sunset shoot the evening before.
I also had a nice view of Bygdin to the West from this same spot. I just had to turn 90º to my right and adjust the focal length to get this:
Sunrise over Bygdin. Canon 550D, Canon EF-S 15-85 mm f/3.5-5.6 IS USM @76 mm, f/8, 1/4 s, ISO 100
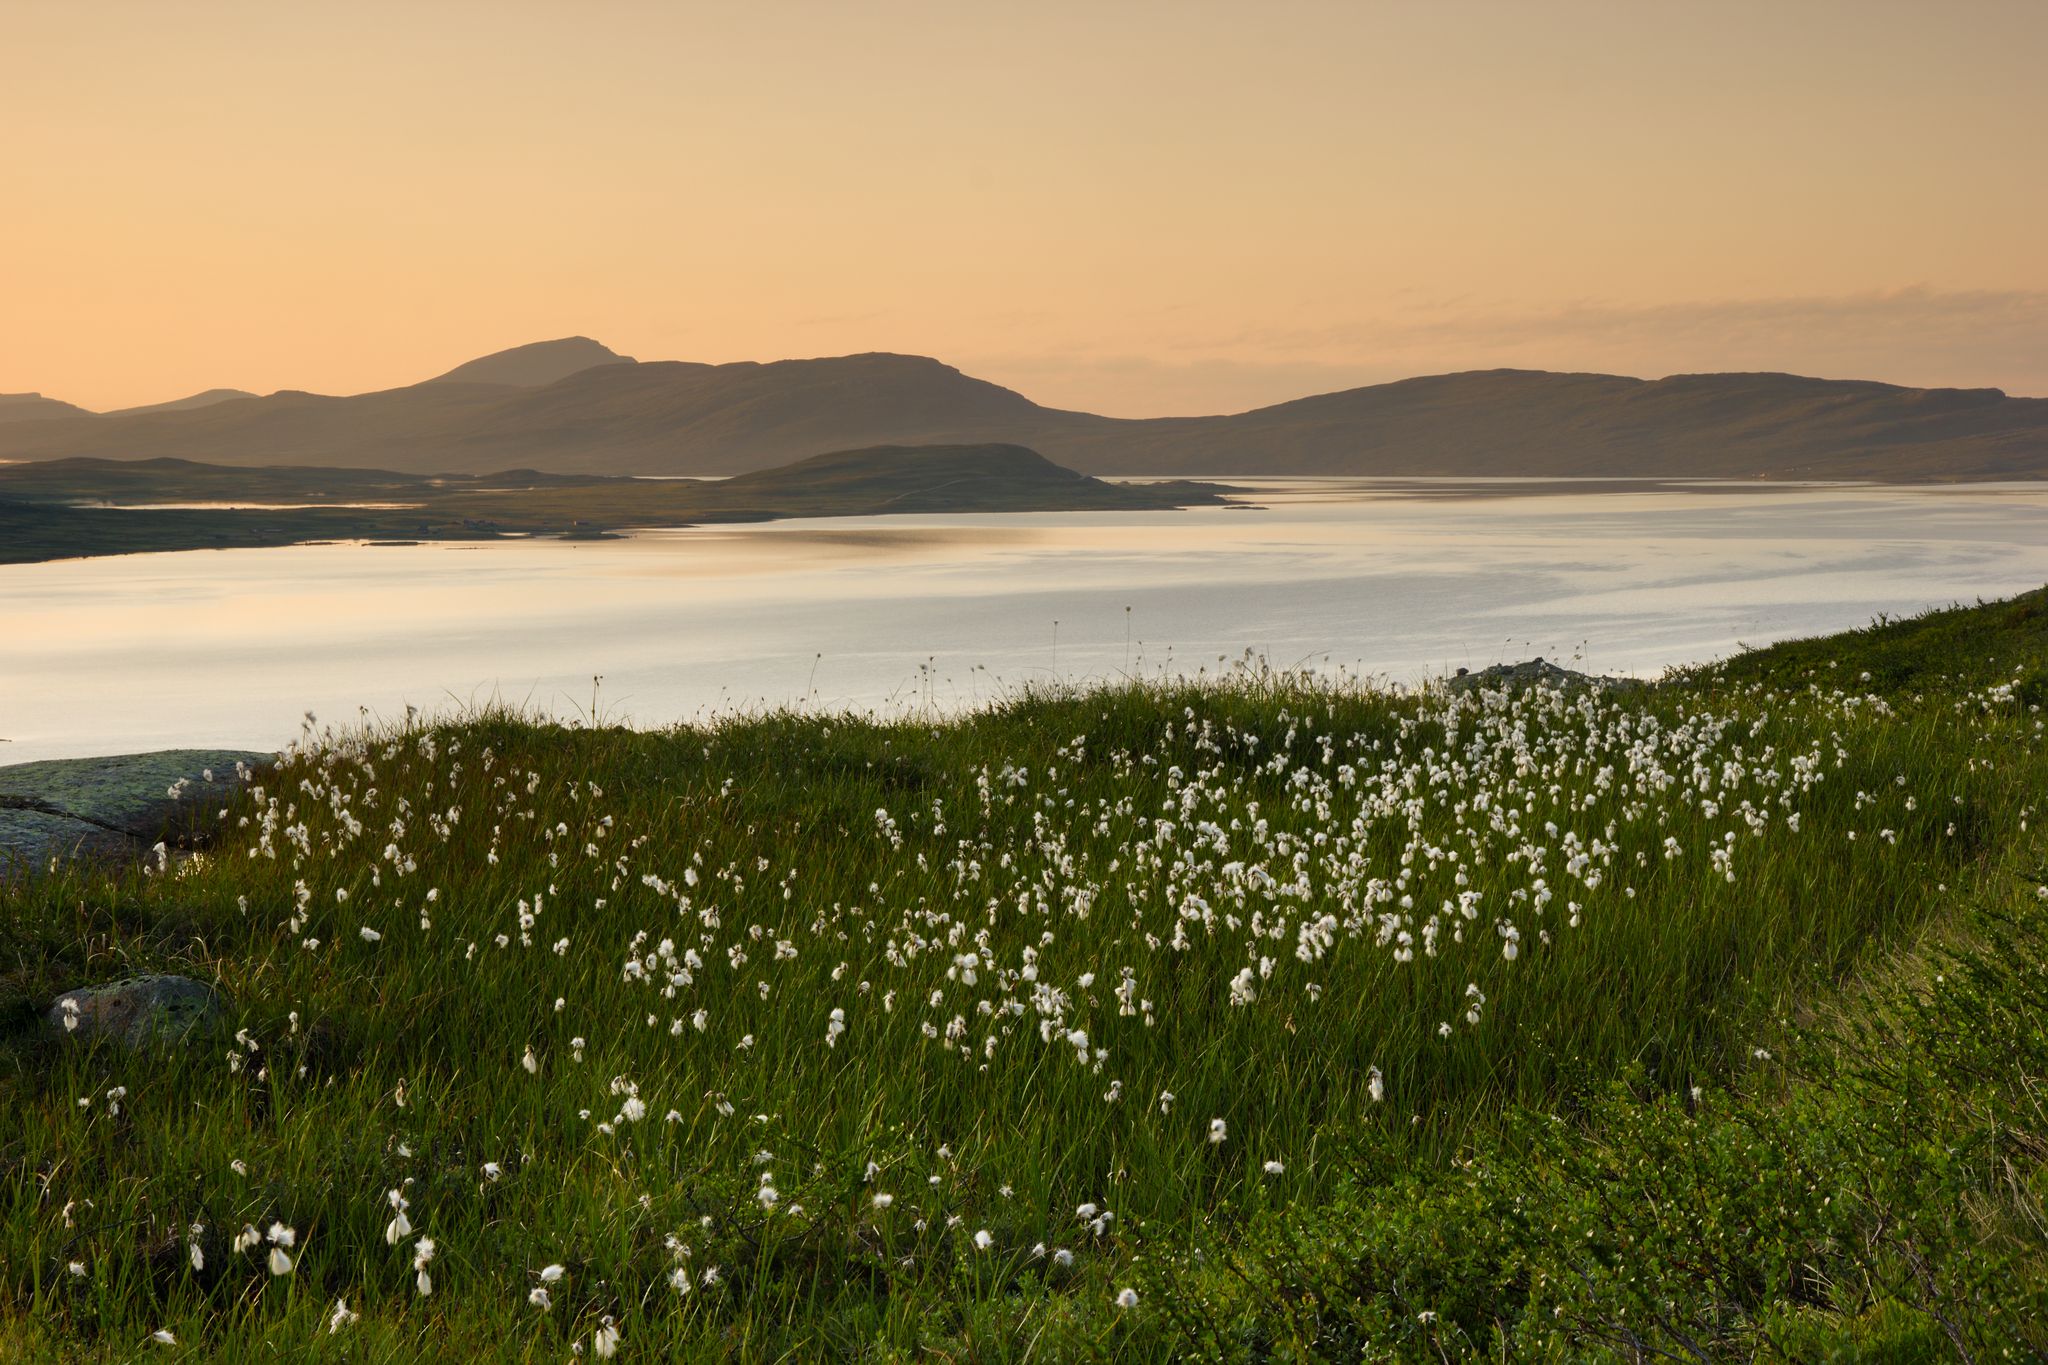
With a nice sunrise in the can, it was time to break up and head home. On my way back to the car I came by a small field of cotton-grass (Eriophorum), backlit by the morning light. I just had to get that too.
Cotton-grass. Canon 550D, Canon EF-S 15-85 mm f/3.5-5.6 IS USM @42 mm, f/14, 1/6 s, ISO 100, focus stack.
For this to work, I needed the whole image to be sharp from front to back. With a focal length of 42 mm that is not possible in one shot, so I focus stacked two images, one with focus on the cotton-grass and one with focus on the background. I also normally don’t want an aperture smaller than f/14.
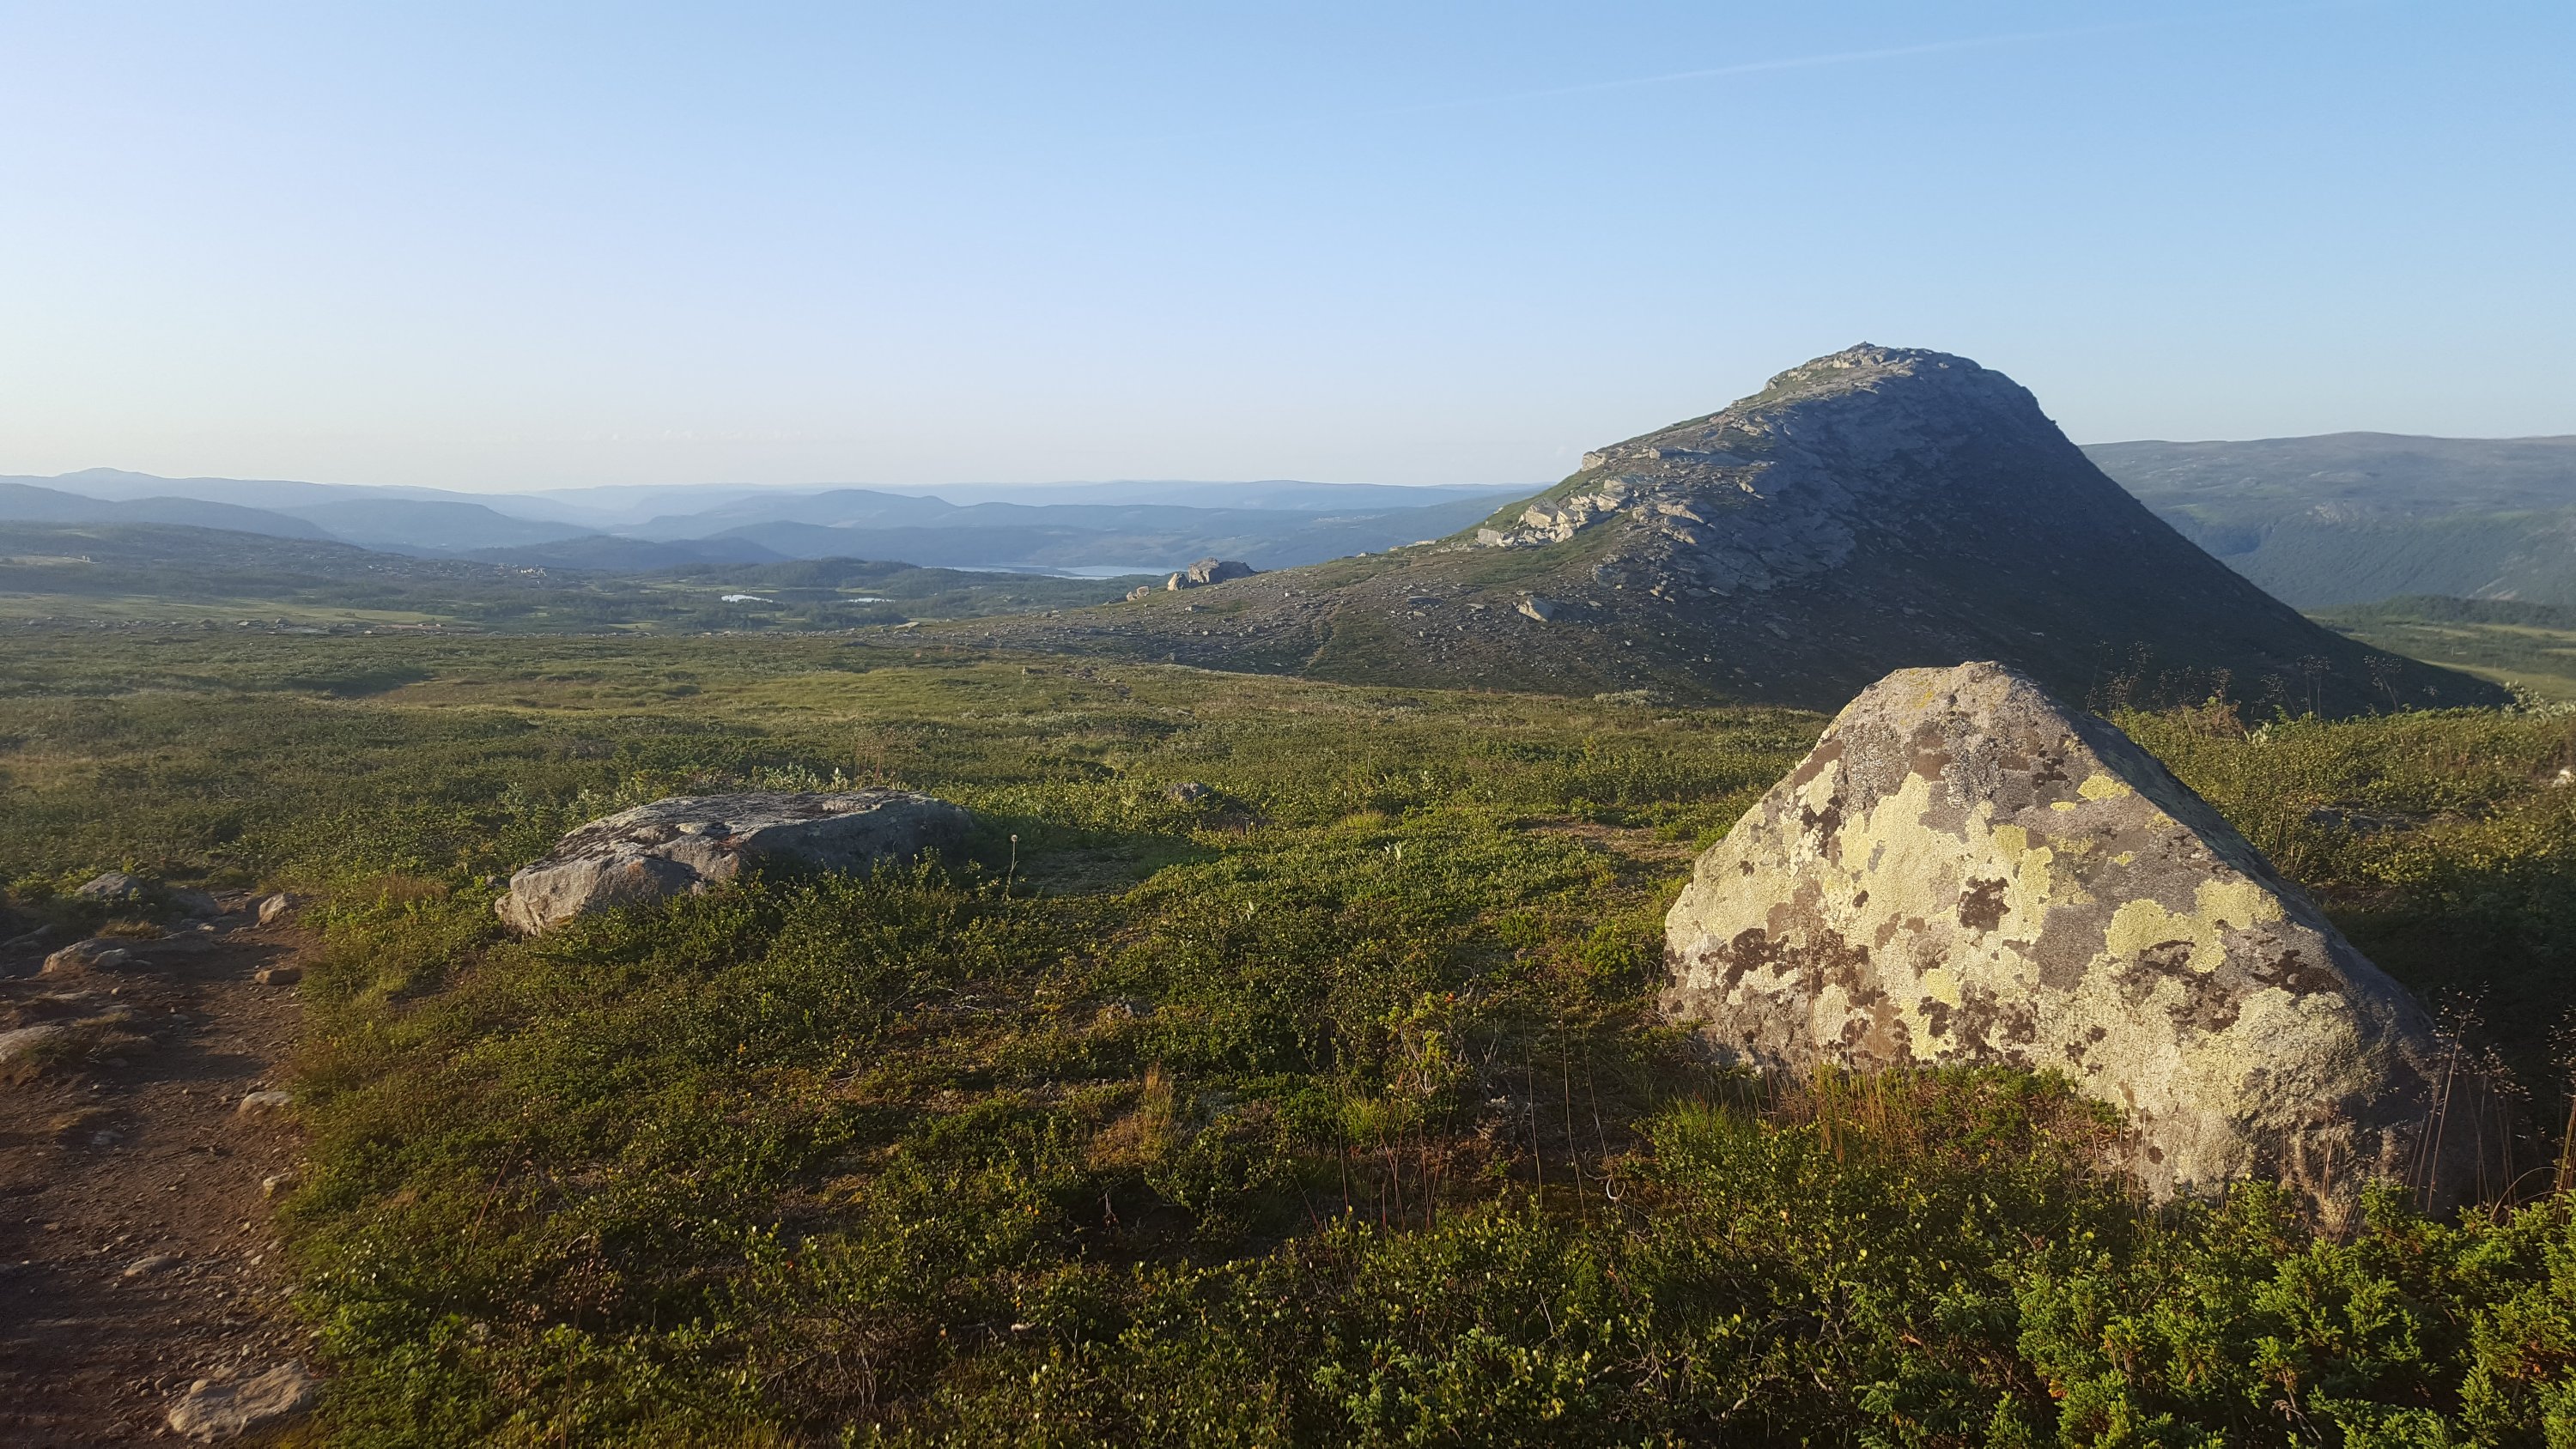
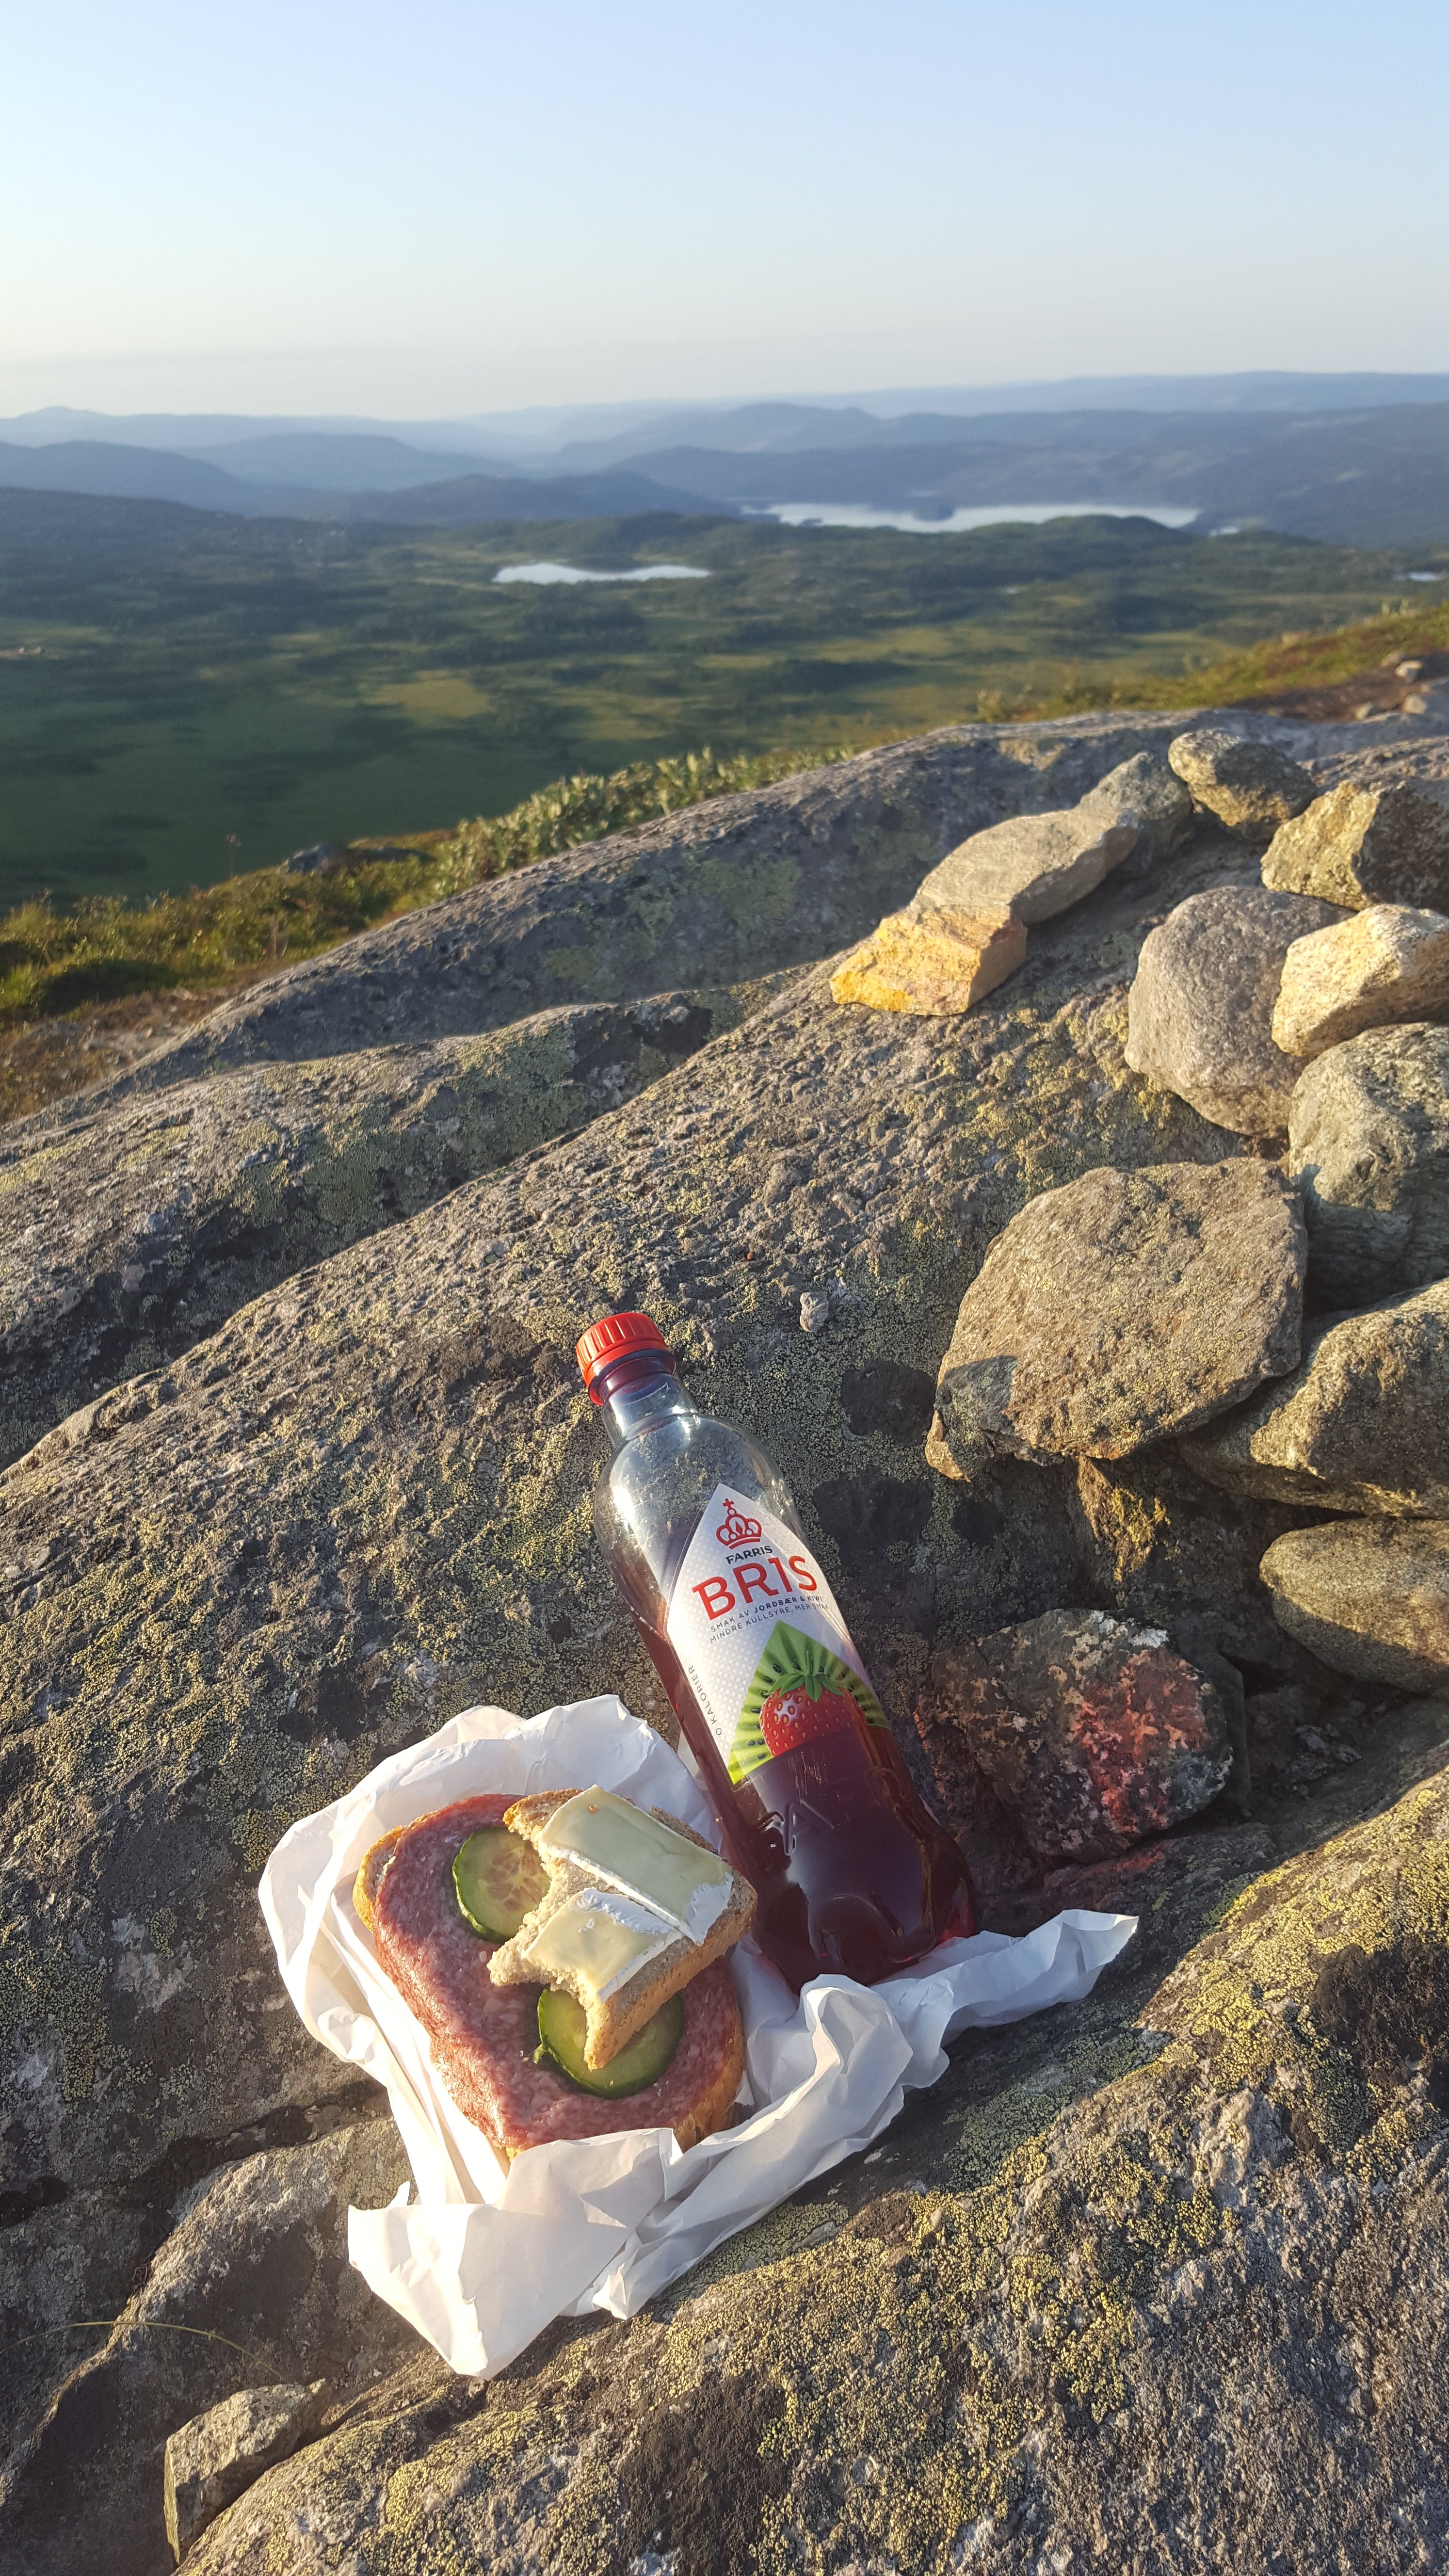
By now I started to feel the need for some breakfast. I went back to the car and started on my way home, intending to find somewhere to eat in the morning sun. Just past Bitihorn and Båtskaret, I found what I was looking for. A small peak in the open landscape, just a couple of hundred meters from the road, and with a parking space nearby, was bathing in sunlight. I took my breakfast and climbed to the top.
With Bitihorn behind me and the valley of Øystre Slidre spreading out in front of me, I enjoyed one of the best breakfasts I had had in a long time.
This summer I had a few days to my self at our cabin in Valdres, Norway. One day I decided to drive to Valdresflya, which is a mountain area just outside Jotunheimen National Park. I wanted to spend the night there, so I could get both the sunset and the following sunrise. I also wanted to sleep in my car. That was not very comfortable, but it made it easy to get up for sunrise.
So I drove north towards the sinking evening sun. My goal was to photograph a mountain called Bitihorn, which lies as a watch post at the entrance of Valdresflya, just where the road passes through Båtskaret (Boat Pass). Nearby is also the lake Bygdin, with a hotel by the shore, another potential photo location.
Just before the hotel, there was something holding up the traffic. It turned out to be a herd of cows on their way home for the evening, longing to get milked.
Cows passing Bygdin Hotel, with Bitihorn in the background.
Just after passing the cows, I noticed a low ridge to the right of the road. I thought it would provide good views of both Bygdin and Bitihorn, so I found a place to park the car, put on some extra clothes, grabbed my camera bag and went for a short hike up the ridge.
I noticed an area with some nice yellow flowers covering the ground. In the background, Bygdin was stretching out into the distant mountains. Some nice, puffy clouds were just starting to catch colour from the setting sun, even though it still was an hour until actual sunset. This scene called for a wide angle shot with lots of depth of field. I set up my camera with the Sigma 10-20 mm f/3.5 at 14 mm focal length and an aperture of f/11. This meant I needed an exposure time of 1/10 s for the foreground. I’m not too good at remembering which graduated filters I end up using, but I think I ended up with my 4-stop hard edge filter to darken down the sky.
Flowers in front of Bygdin. Canon 550D, Sigma 10-20 mm f/3.5 @14 mm, f/11, 1/10 s, ISO 100, 4-stop hard grad.
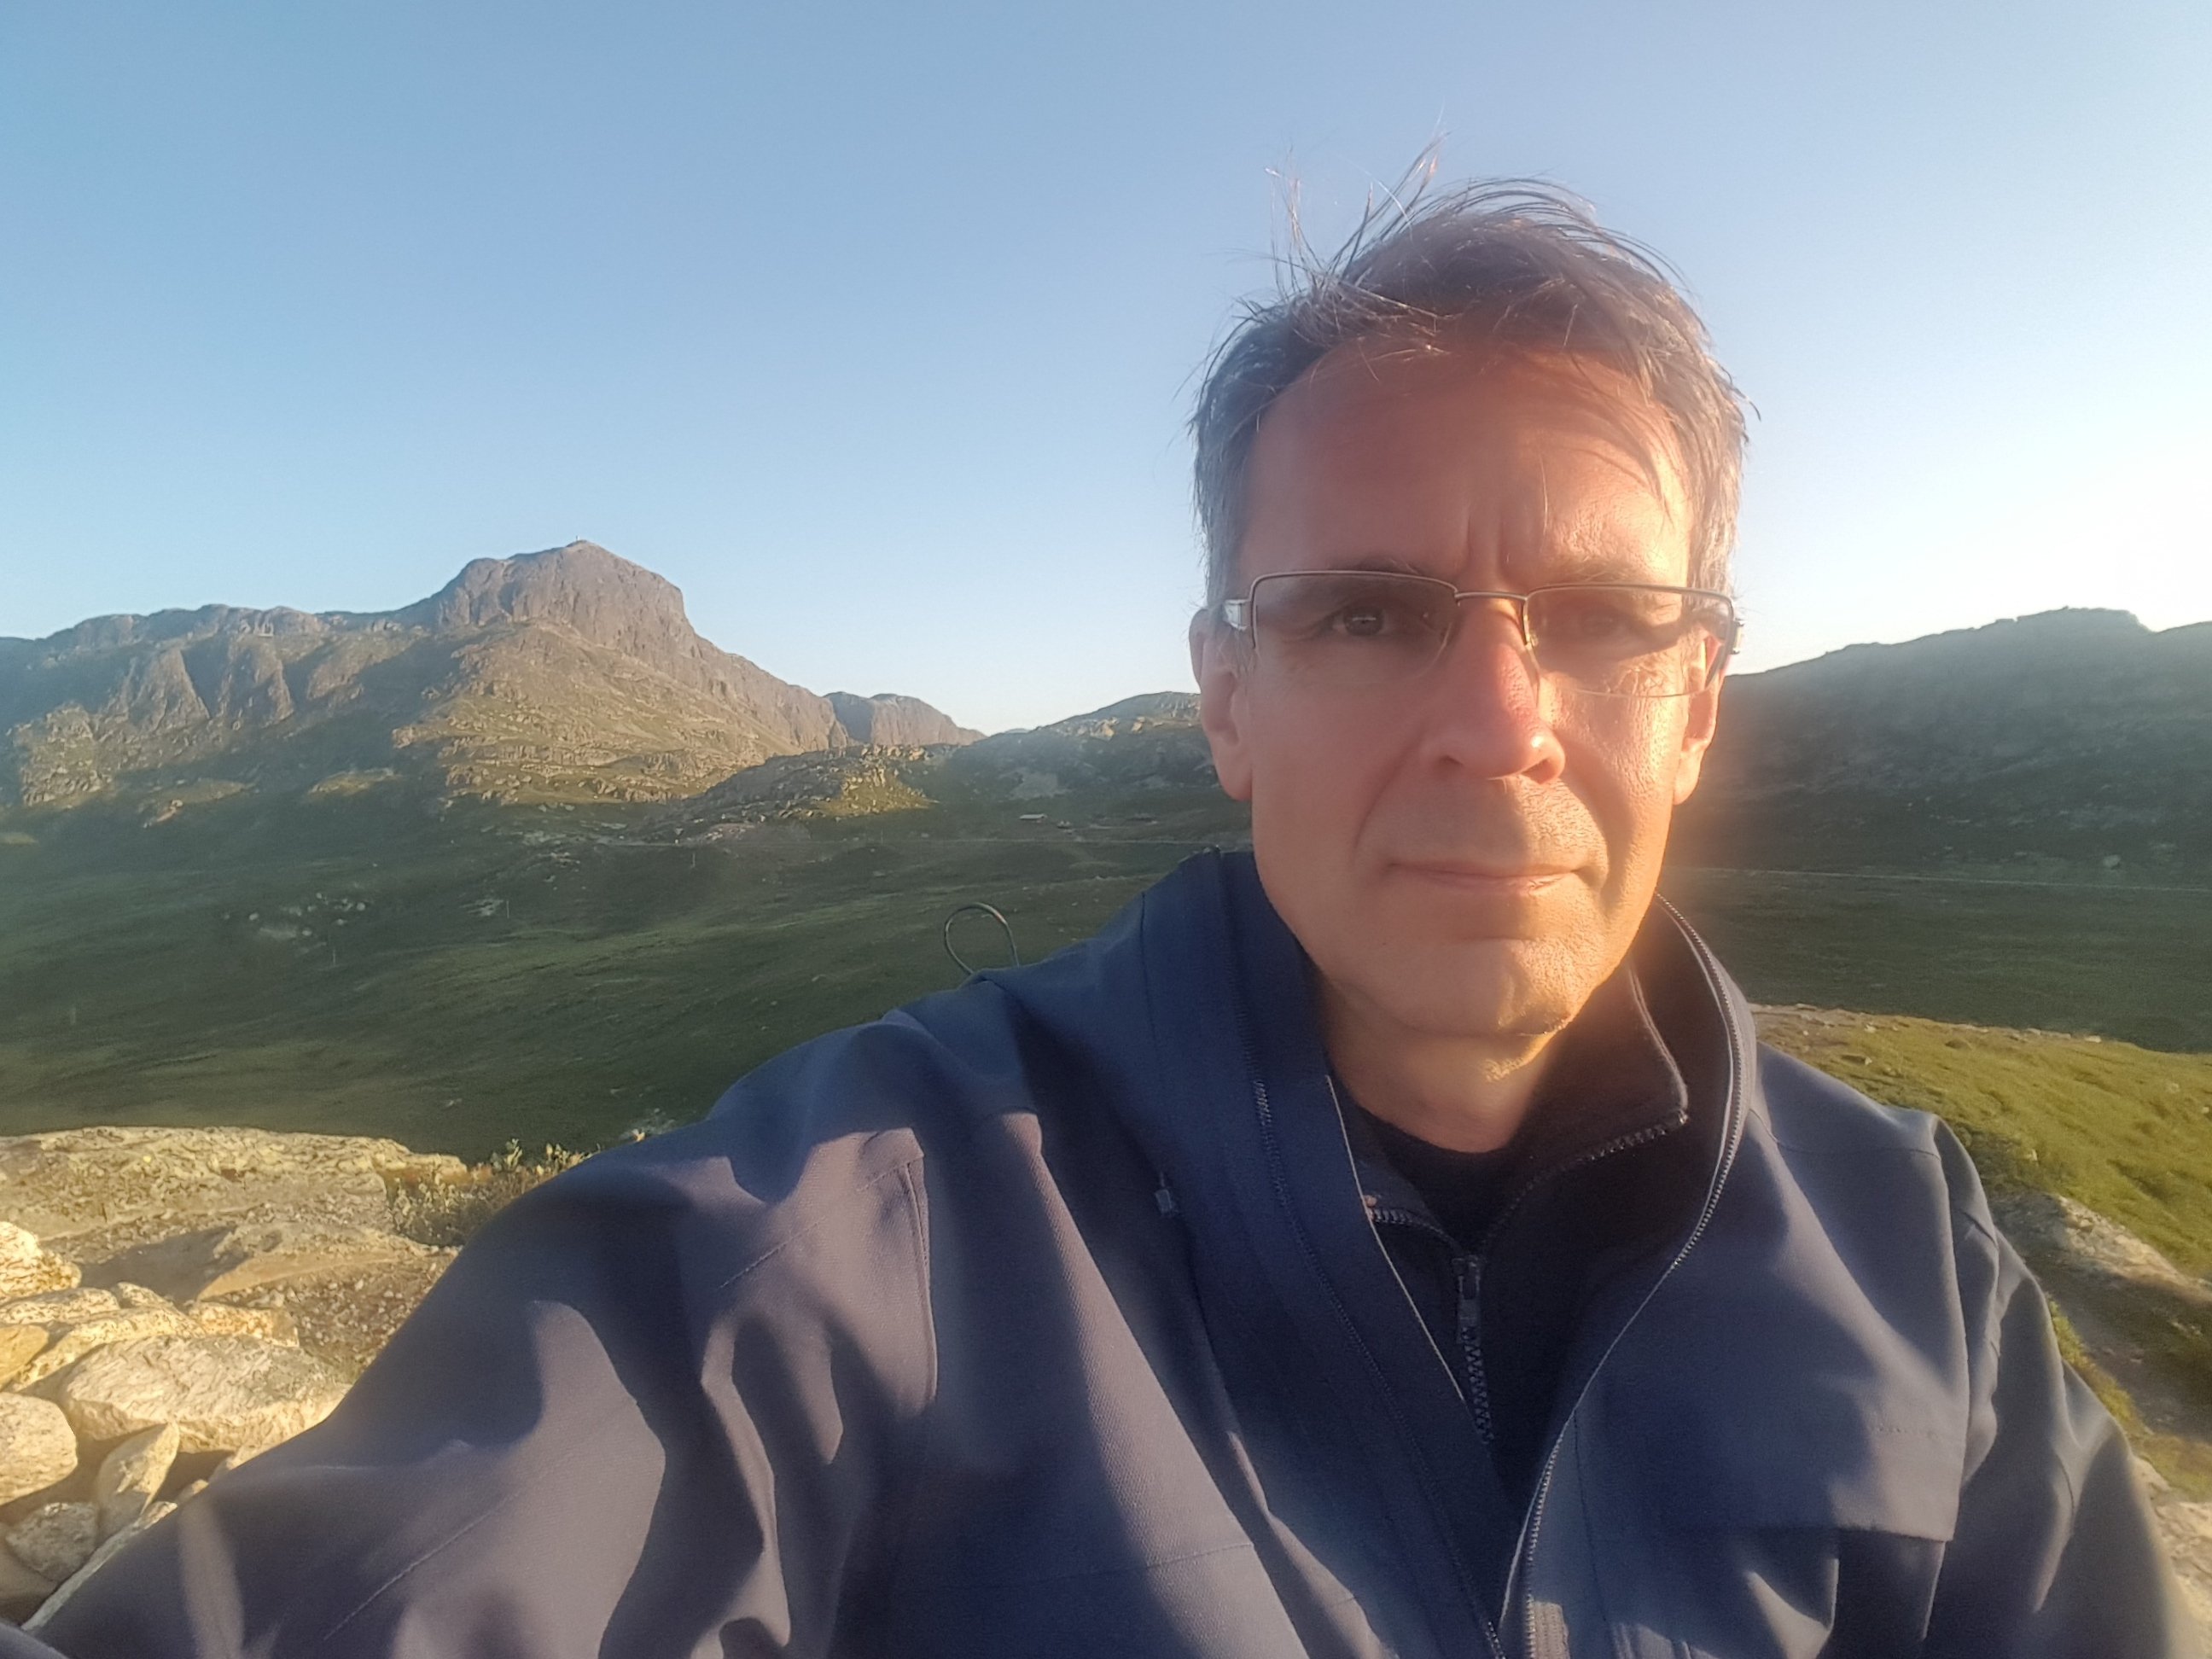
With this first «serious» photo of the trip done, it was time to prepare for the sunset photo of Bitihorn. I found a position with a good view to the south, and sheltered from the cool wind that was starting to pick up from the north. There were also several possible compositions, both wide and more close. I switched to my standard lens, the Canon EF-S 15-85 mm. While waiting for the light, I used the 10 second timer to take a selfie.
Selfie in front of Bitihorn. Canon 550D, Sigma 10-20 mm f/3.5 @20 mm, f/11, 1/10 s, ISO 100.
I knew that at the time of sunset, at around 10 pm, the sun would be blocked by the taller mountains of Jotunheimen, so my last chance of sunlight hitting Bitihorn would be some time before that. I wanted the last light hitting the top, and as much of the mountain as possible, so I watched closely, taking a photo whenever there was some sunlight. In the end, when the light finally hit the mountain top for a few minutes, there was no light anywhere else. I had another shot that I took a few minutes earlier, with sunlight hitting a small ridge at the foot of the mountain. In the final image I blended in a bit of this one to get the effect that I wanted. I used no filters on this one, but I bracketed with two stops on either side to get both the bright sky and clouds and the shadowed side of the mountain well exposed.
Last sunlight on Bitihorn. Canon 550D, Canon EF-S 15-85 mm f/3.5-5.6 IS USM @50 mm, f/11, bracketed composite.
It was such a beautiful night, and I was really enjoying the solitude and the quietness. There was a small river flowing by beneath me, providing the sound track. I could not hear cars passing on the road, only the occasional motorcycle. While I was sitting there and the light faded away I found myself thinking about life, the universe and everything, and as always, the answer was 42.
Jokes aside. From time to time a car passed on the road. There wasn’t much traffic, but a few minutes between each. And the way the road winded along the foot of Bitihorn gave me an idea for another photo. A long exposure with light trails. I put on a 2-stop grad to hold back what was left of light in the sky, and also a 6-stop ND to get long exposure times while it was still not very dark. Since the cars were so few and far between, I would need to follow one car the whole way, and that meant an exposure time of about two minutes. I also chose an aperture of f/8 for maximum sharpness. I don’t remember now if I used the 6-stop on the final image, but the graduated filter is there. I’m not quite sure it was necessary in the end, though.
The Diamond Necklace. Canon 550D, Canon EF-S 15-85 mm f/3.5-5.6 IS USM @65 mm, f/8, 121 s, ISO 100
I like this image very much, I think it is my favourite from this trip. The light trail reminds me of a diamond necklace, framing the peak of Bitihorn.
By now it was almost getting dark. There was just enough light to find my way back to the car. I drove a few kilometers further, then I found a parking lot and tried to get a few hours of rest before sunrise.
If you have been with me so far, then please stay tuned for Part 2, about the following morning’s sunrise shoot.
Endret: Printler har dessverre opphørt, men er du fortsatt interessert i bilder kan du ta kontakt med meg direkte via kontaktsiden min.
Er du på utkikk etter et nytt bilde til å ha på veggen? Kanskje du pusser opp stua eller har nylig flyttet til nytt hus eller ny leilighet? Da ønsker du deg kanskje noe nytt til å ha på veggen, noe som vil ta seg godt ut i et moderne interiør dominert av dempede, nøytrale farger.
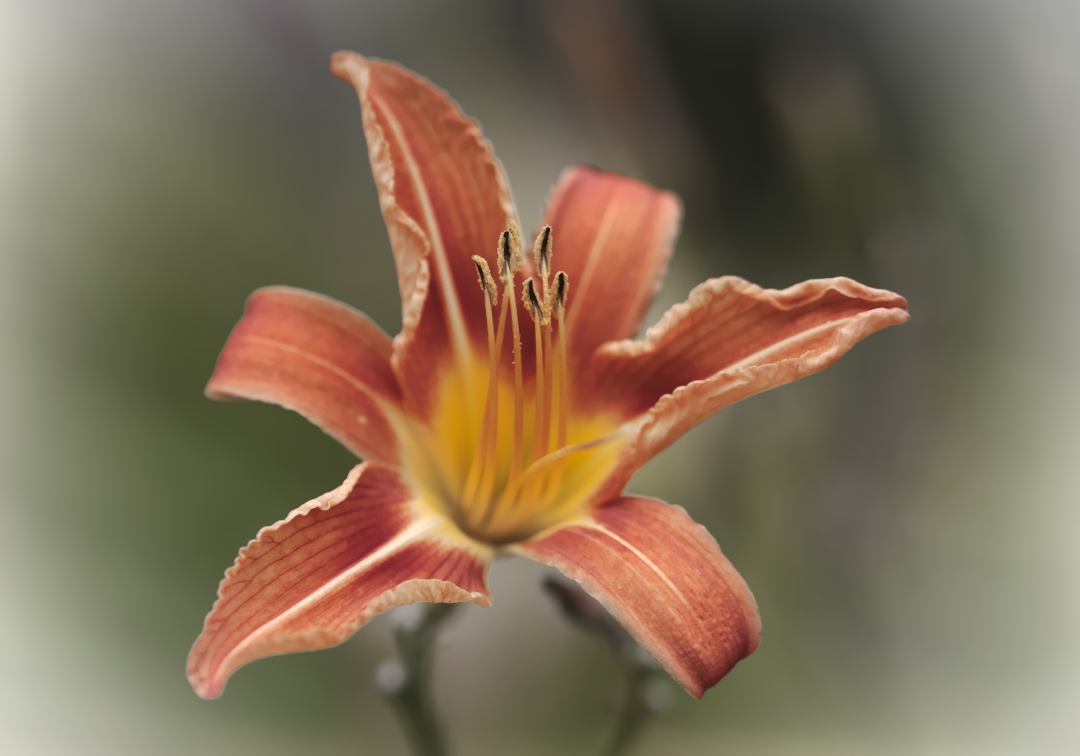
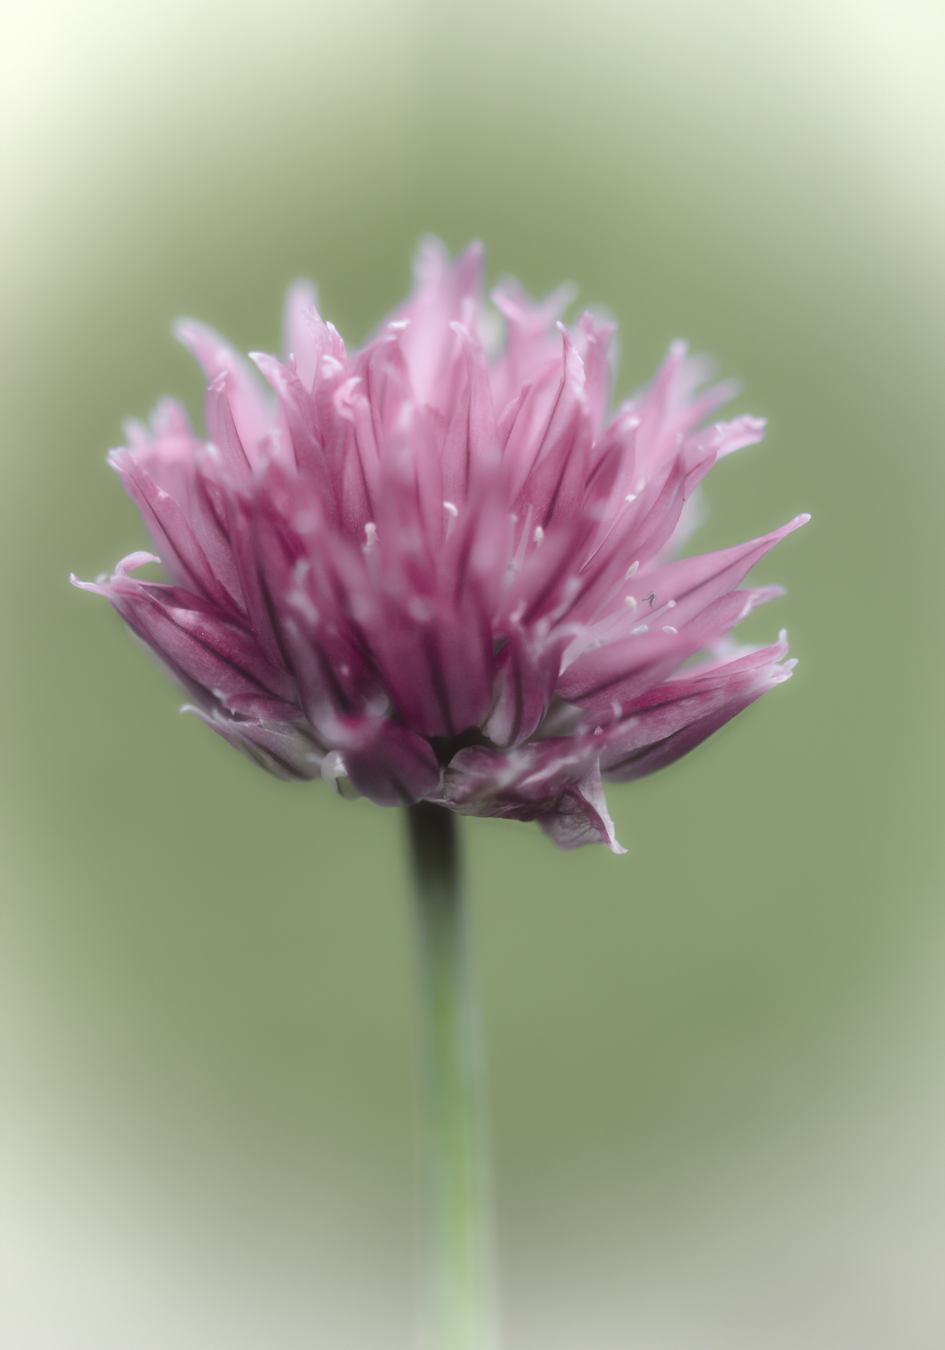
Jeg har nylig plukket ut noen av mine beste nærbilder av blomster og redigert dem på nytt for å lage en serie bilder i en enhetlig, moderne stil. Bildene har en begrenset fargepalett og lar hovedmotivet stå ut fra en myk, uskarp bakgrunn. Jeg tror disse bildene vil bidra til en avslappet atmosfære både hjemme og på kontoret.
Alle bildene er for tiden bare tilgjengelige i min Printler-butikk. Du kan se bildene under her og klikke på bildene hvis du vil kjøpe.